Before you start:

  • Check if your camera supports motion detection. For the list of compatible cameras, see https://www.qnap.com/go/compatibility-qvr-pro?motion_detection=true.

  • If your camera does not support motion detection, you can use the built-in motion detection feature. QVR Pro provides up to two channels for motion detection analysis and supports resolutions up to 1080p.

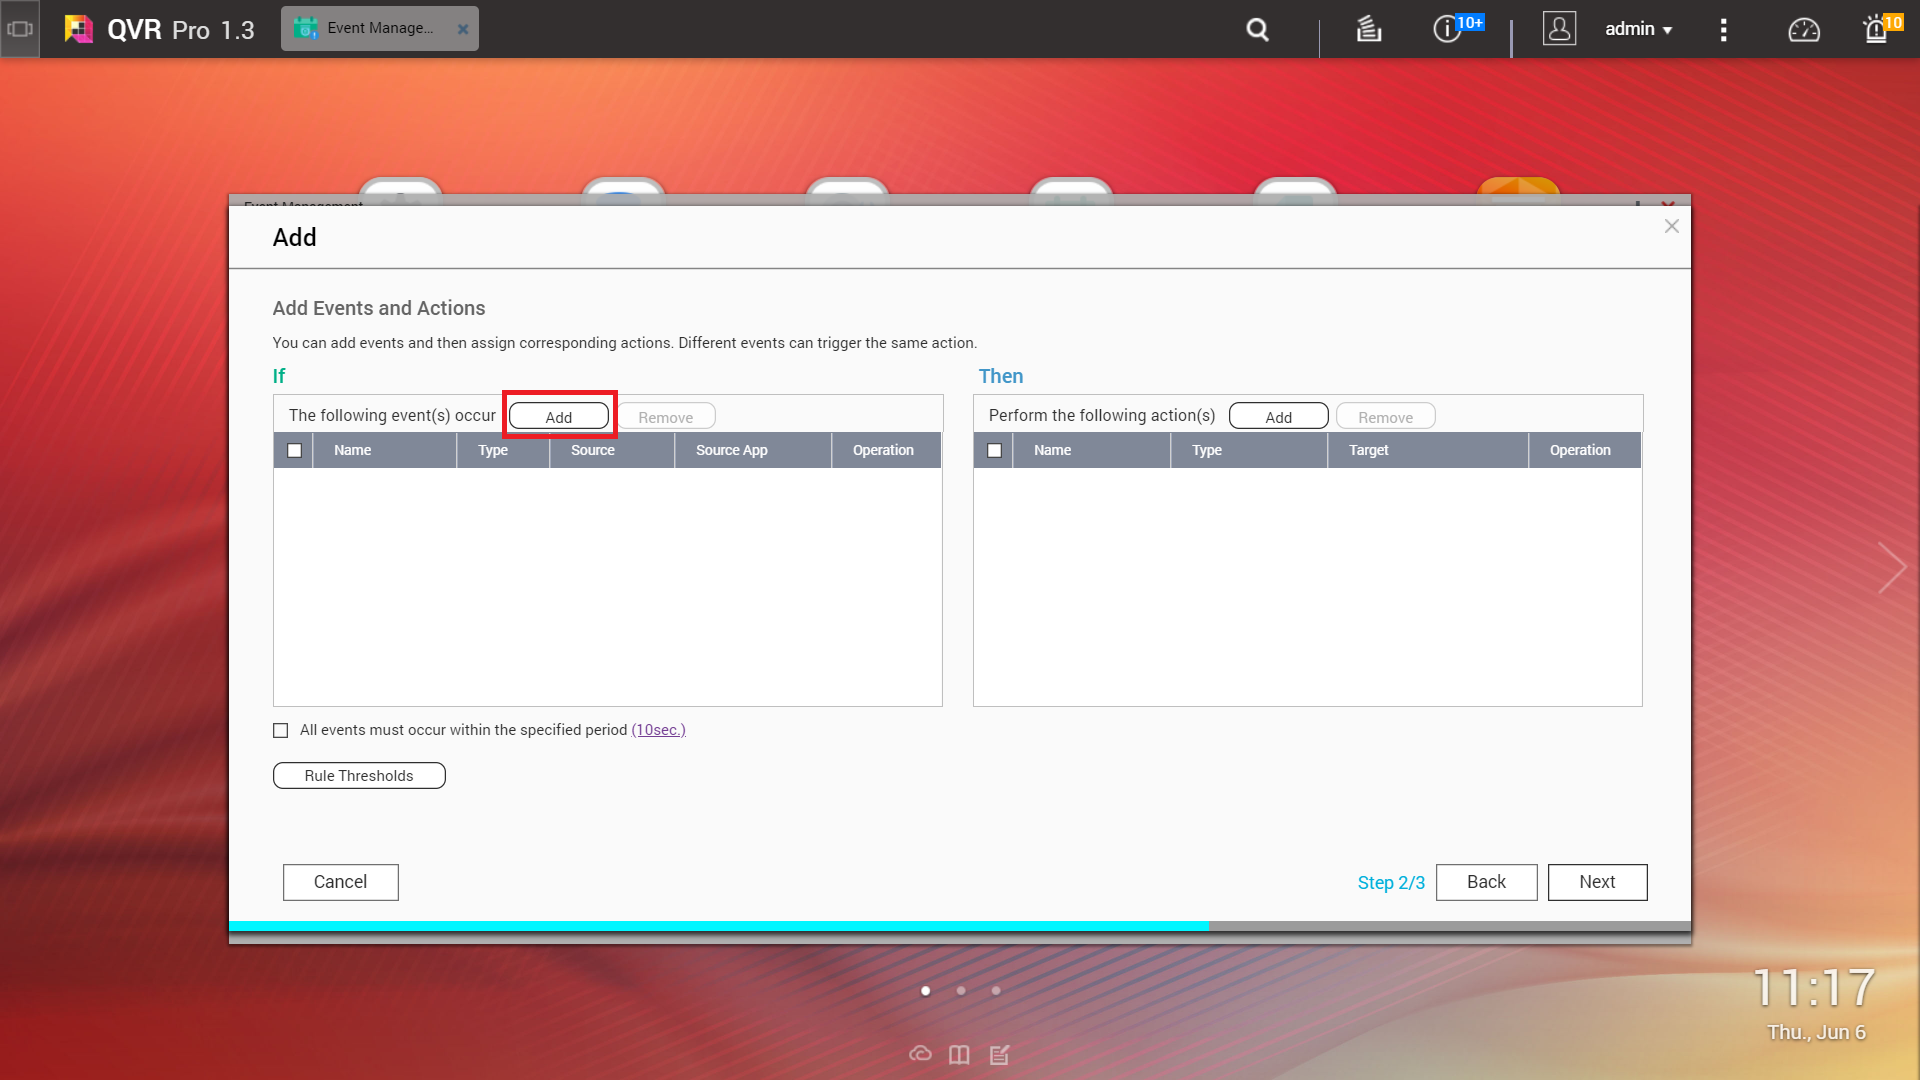
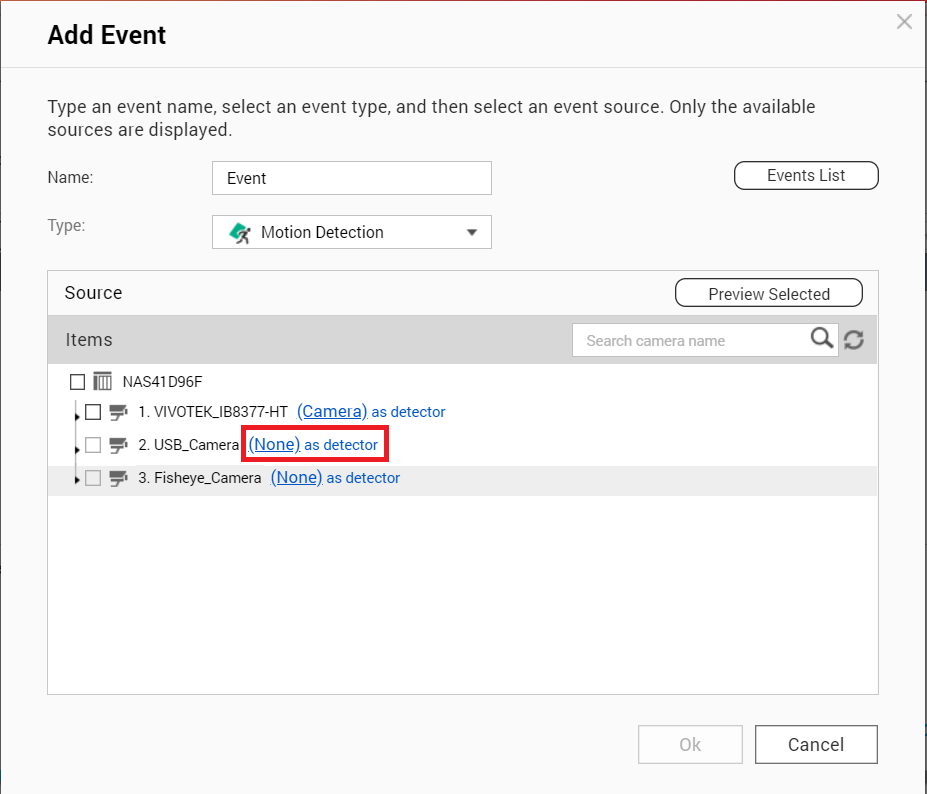
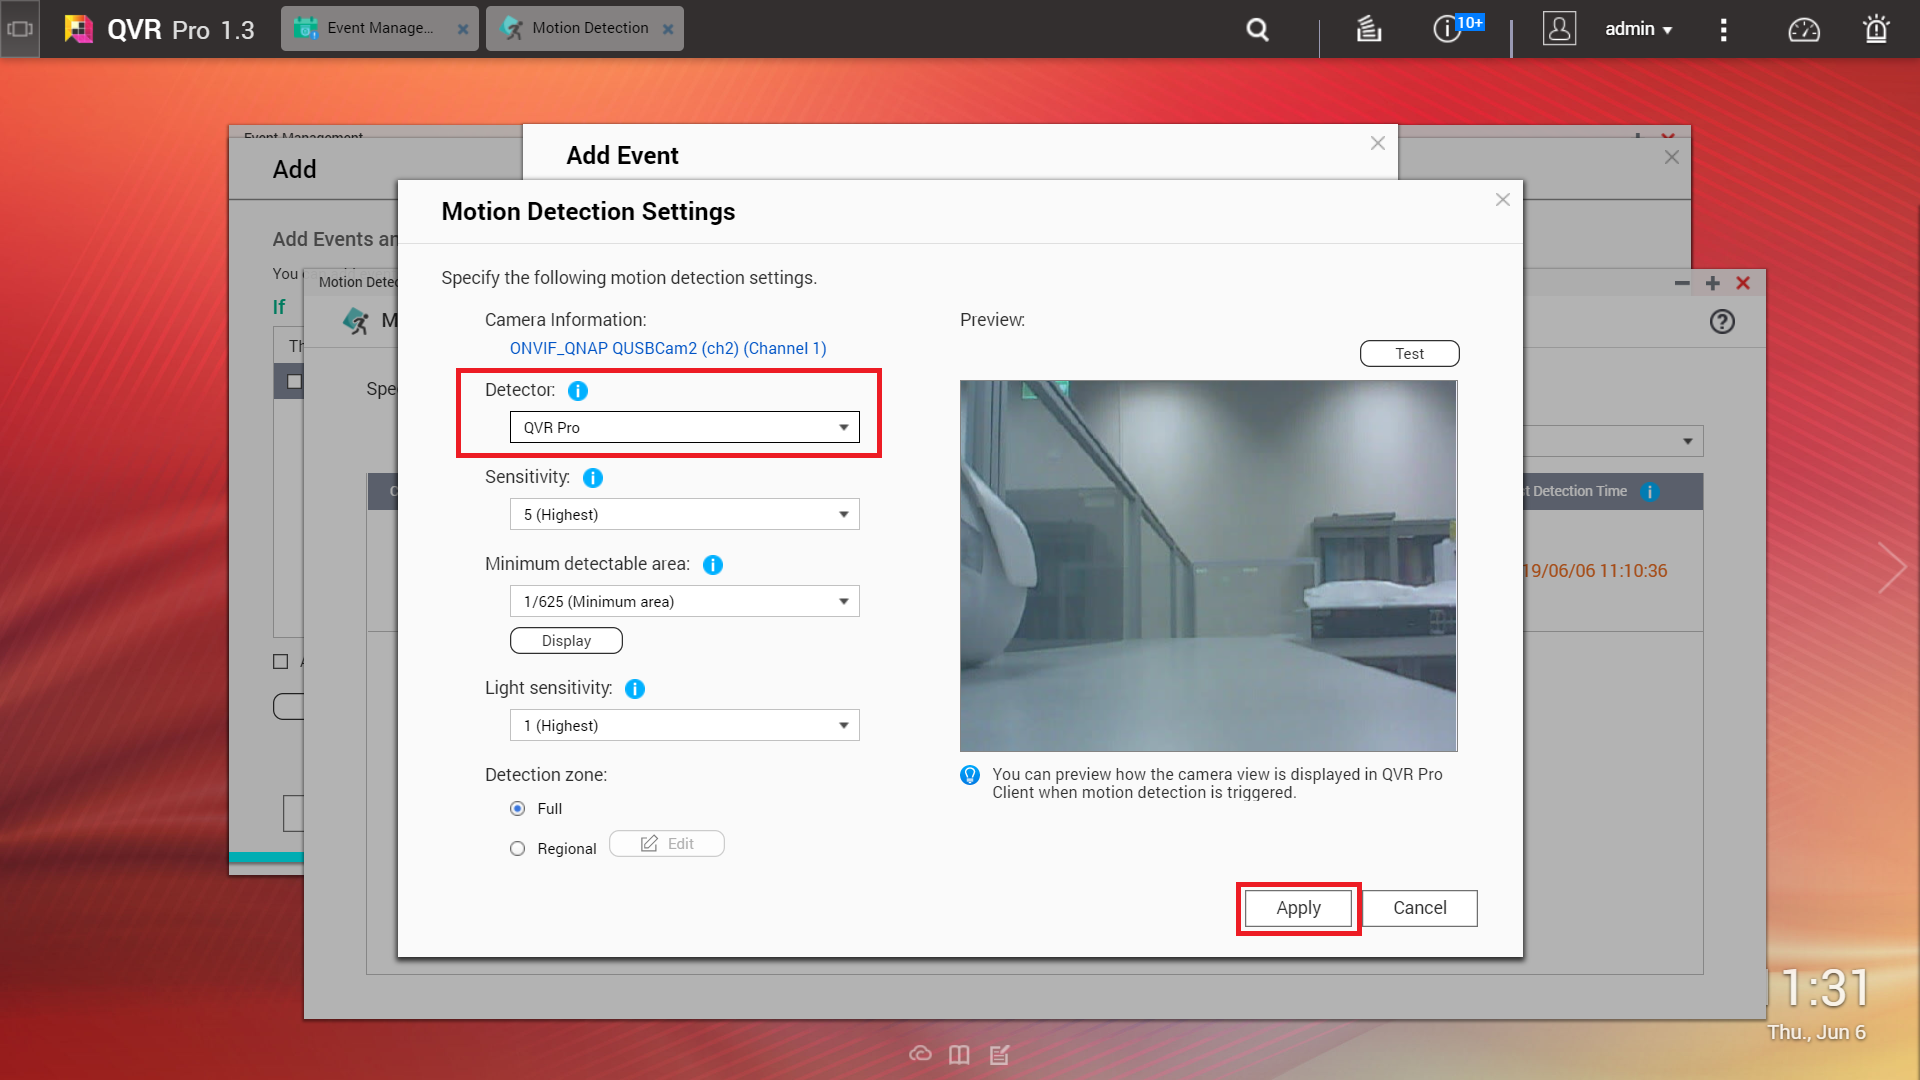
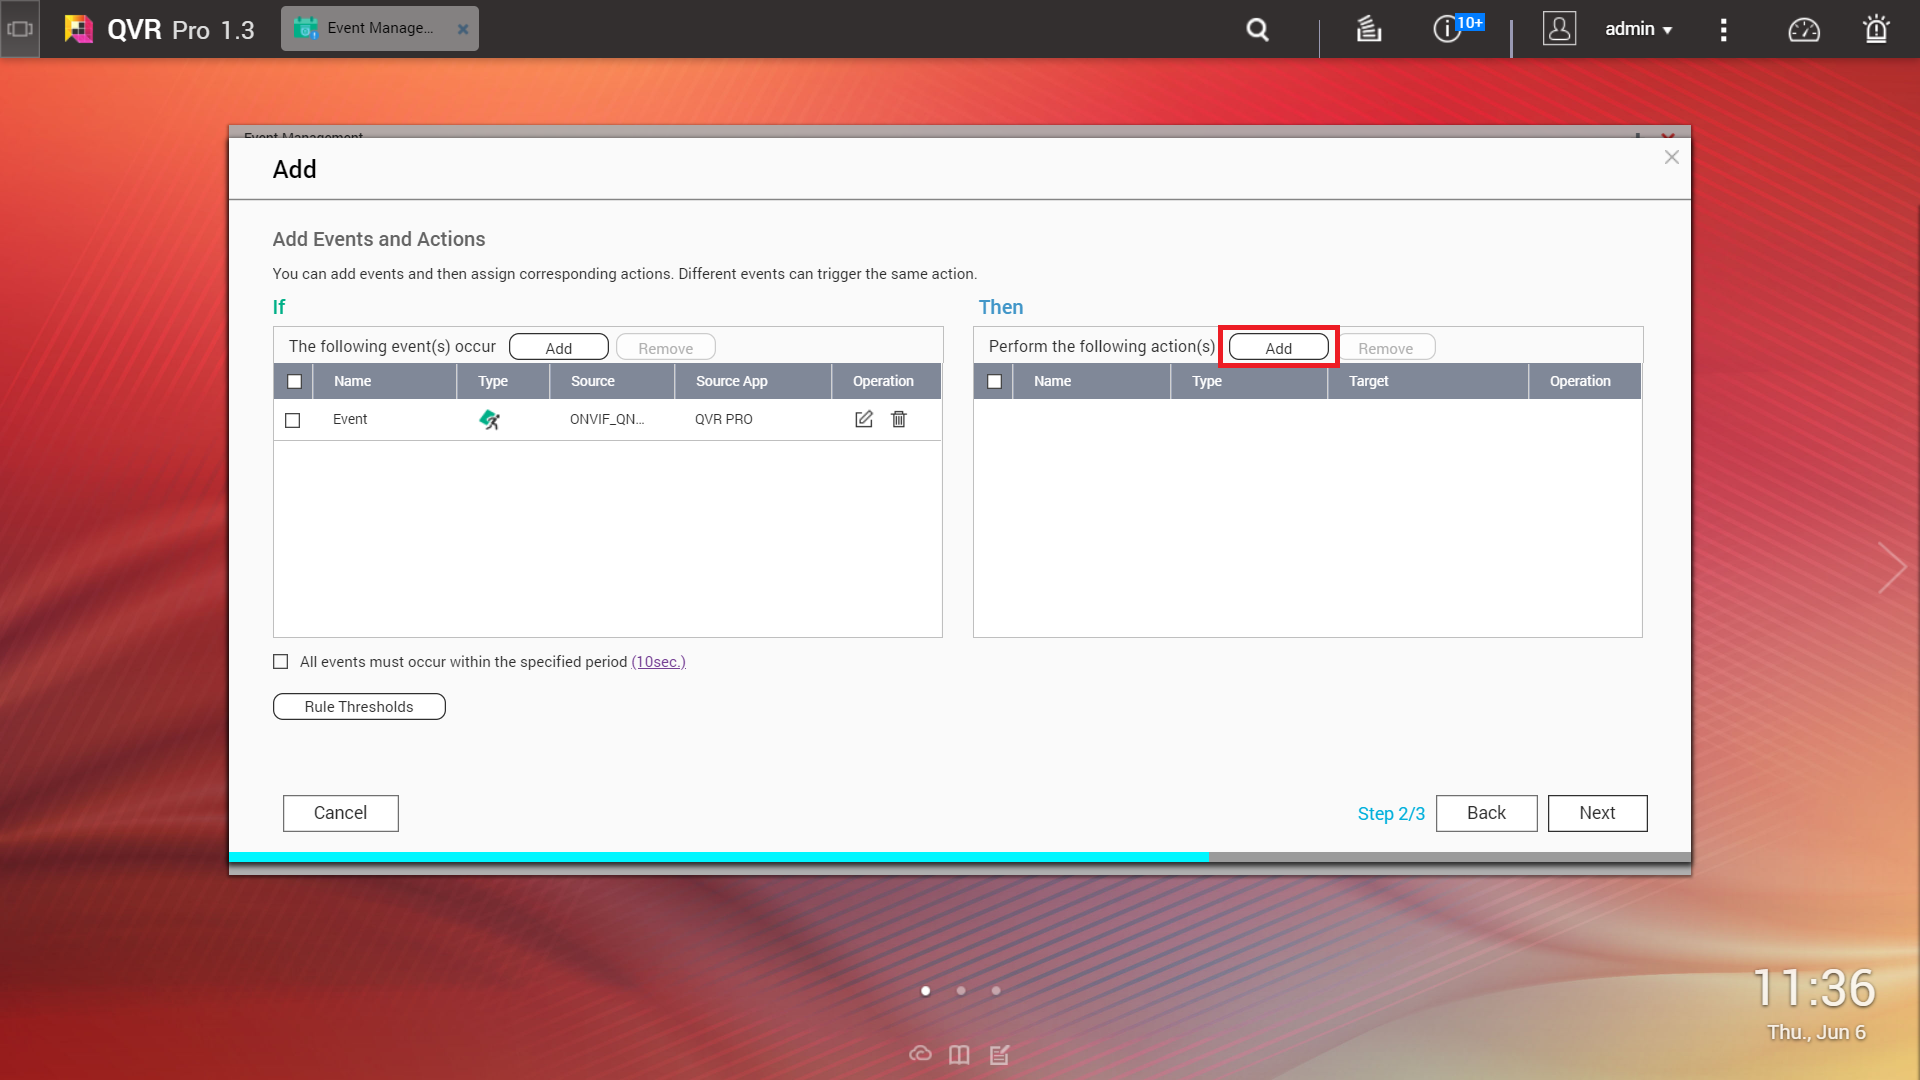
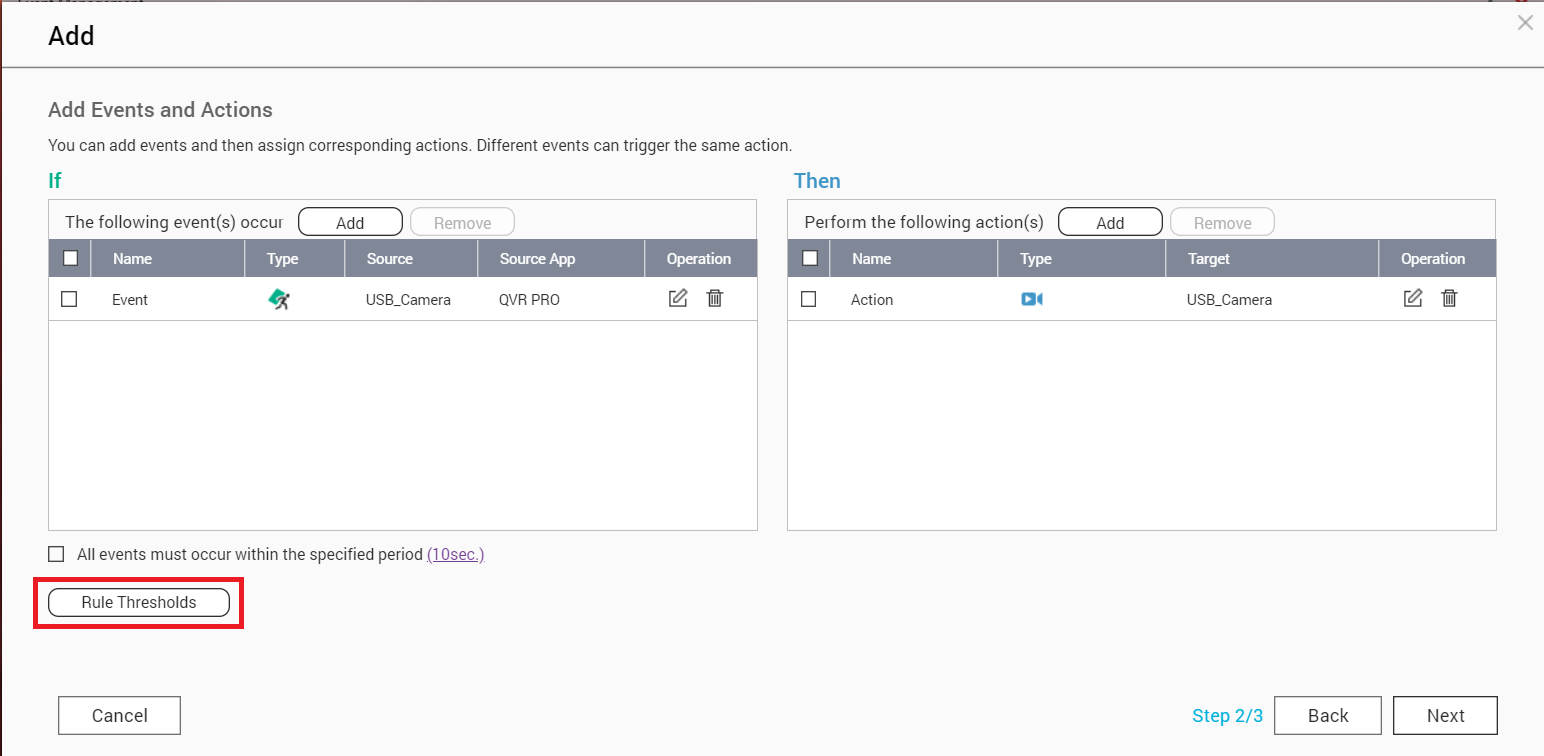
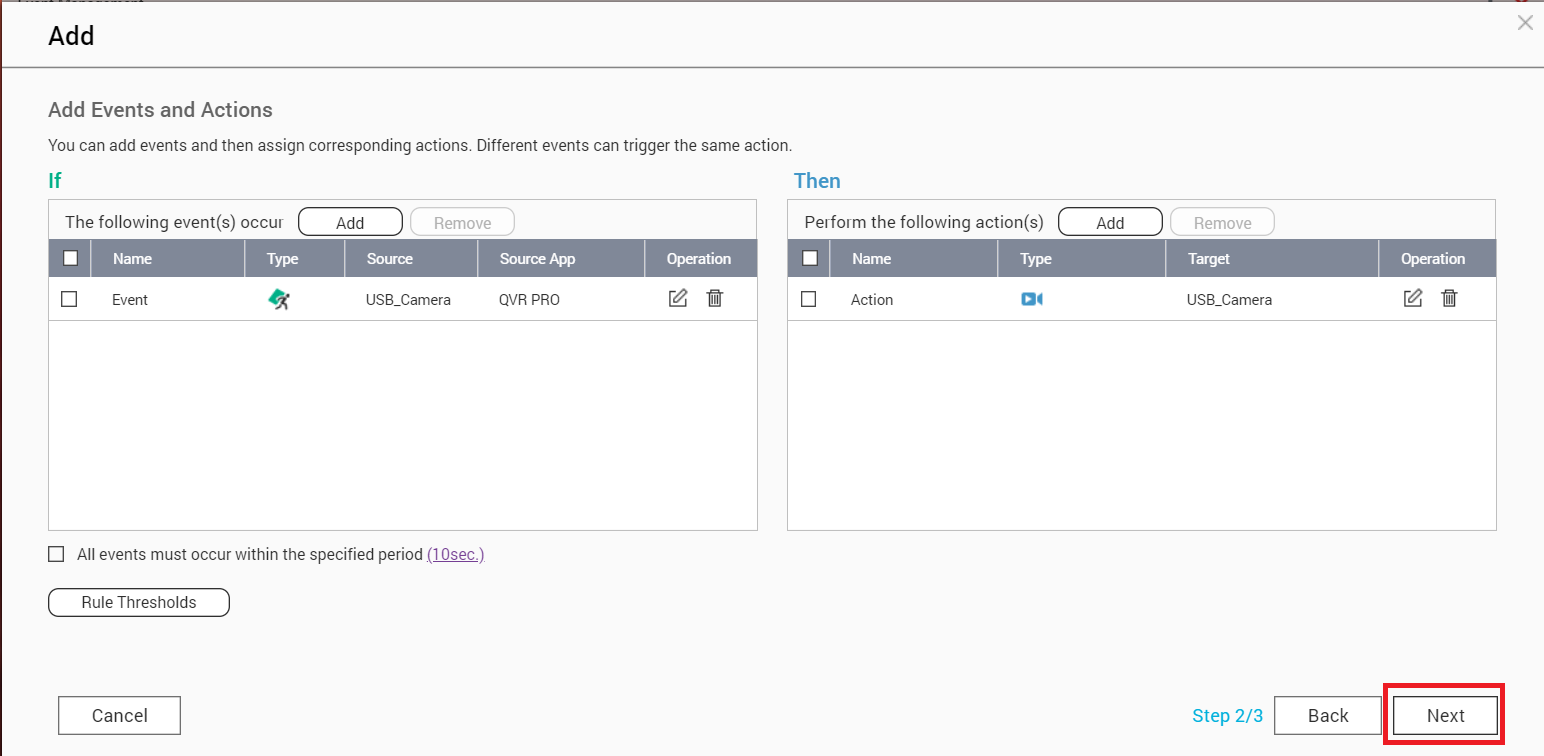
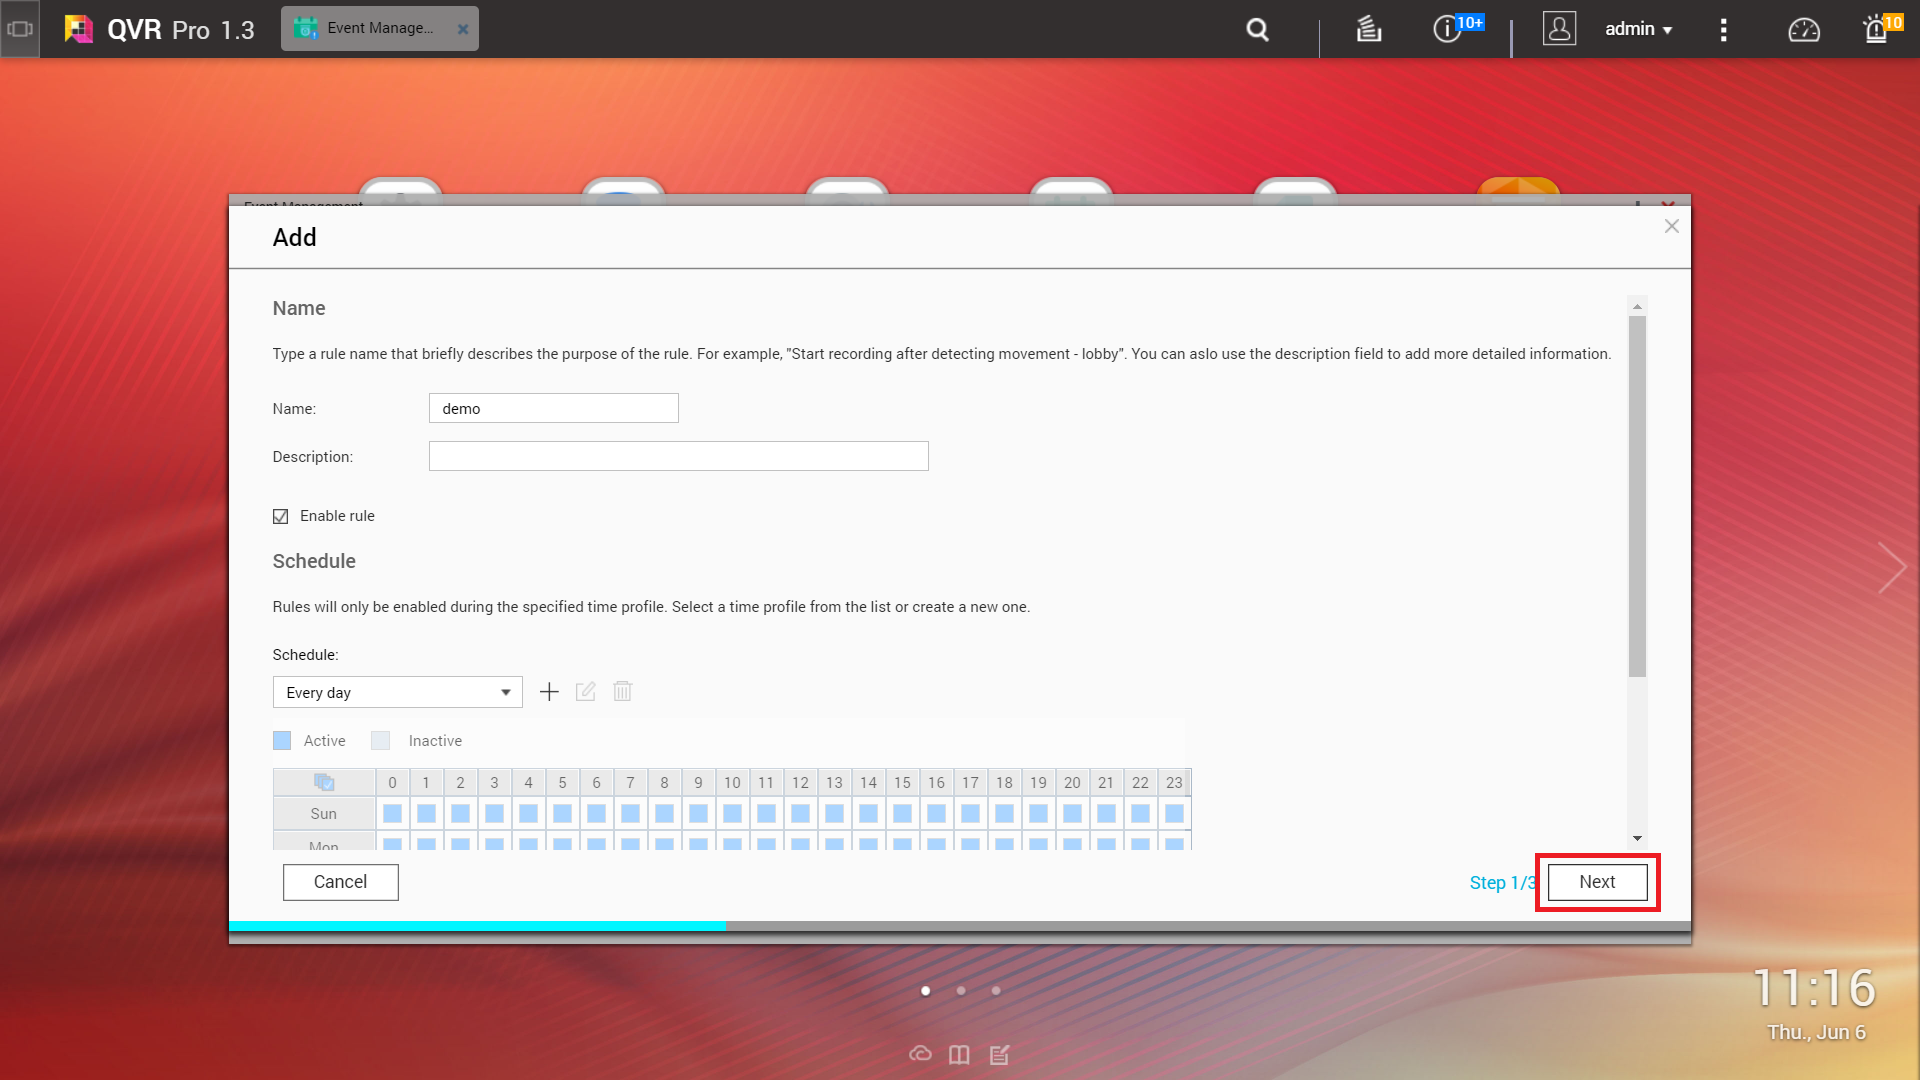
QVR Pro allows you to create rules for monitoring motion detection events and assigning actions. Each rule follows a specified schedule, and a set of events and actions. When the events occur within the selected schedule, QVR Pro performs the corresponding actions.

You can also decide whether all events are required to occur within a specified period before applying the actions.

Tip:
You can add up to 128 rules.
1. Open Event Management from the desktop or from the main menu.

2. Click one of the following buttons.
Option Description
+ Click to add your first rule.
Add Click to add more rules.
The Add Rule screen appears.
3. Under Name, type the following information.
Field Task
Name Type a name for the rule.
Description Type a description that provides more detailed information about the rule.
4. Select Enable rule.

5. Under Schedule, select a schedule
Note:

The schedule indicates the hours and days when an event is considered valid. You can use the default settings or create custom schedules by clicking Add ().

6. Click Next.

    The Add Events and Actions screen appears.

7. Add an event.

a. Under If, click Add.

The Add Event screen appears.

b. Type an event name.

c. Select Motion Detection as the event type.

d. Complete the following steps to specify the source.

I. Locate the correct camera and then click None.

The Motion Detection Settings window opens.

II. Under Detector, select QVR Pro.

III. Optional: Check the camera settings and make changes, as needed.

Note:

Changing the light sensitivity option may help prevent false motion detection caused by changes in light intensities.

IV. Click Apply.

A confirmation message appears.

e. Click Not Now.

f. Check that Motion Detection is selected and then select one or multiple cameras.

Note:

You can add multiple motion detection cameras to one rule if the cameras support this function. However, you can only select up to two cameras that do not natively support motion detection.

g. Click OK.

8. Add an action.

a. Under Then, click Add.

The Add Action screen appears.

b. Complete the following information.

Field Task
Name Type a name for the action.
Type Select Event Recording.
Target Select the camera(s) from the previous step.

c. Click OK.

    You can add multiple actions to one rule.

  9. Optional: Select All events must occur within the specified period.

10. Optional: Modify the rule threshold settings.

a. Click Rule Thresholds.

b. Modify the following settings, as necessary

Field Description
Event cooldown period The cooldown period refers to the downtime between events.
Event occurrence period If a rule is triggered by multiple events, the events must occur within the specified period for QVR Pro to apply the actions.
Point event A point event refers to an event that only has a start time.

c. Click Apply.

11. Click Next.

12. Click Finish.
The new motion detection rule is successfully added to QVR Pro.