Complete the following steps to add a USB camera to QVR Pro.
Important: QNAP recommends installing a graphics card and the CodexPack app from the App Center to ensure that the USB camera will be compatible with the NAS.
1. Install QVR Pro on your device.
Note: If you already installed QVR Pro, proceed to the next step.
a. Log on to QTS.
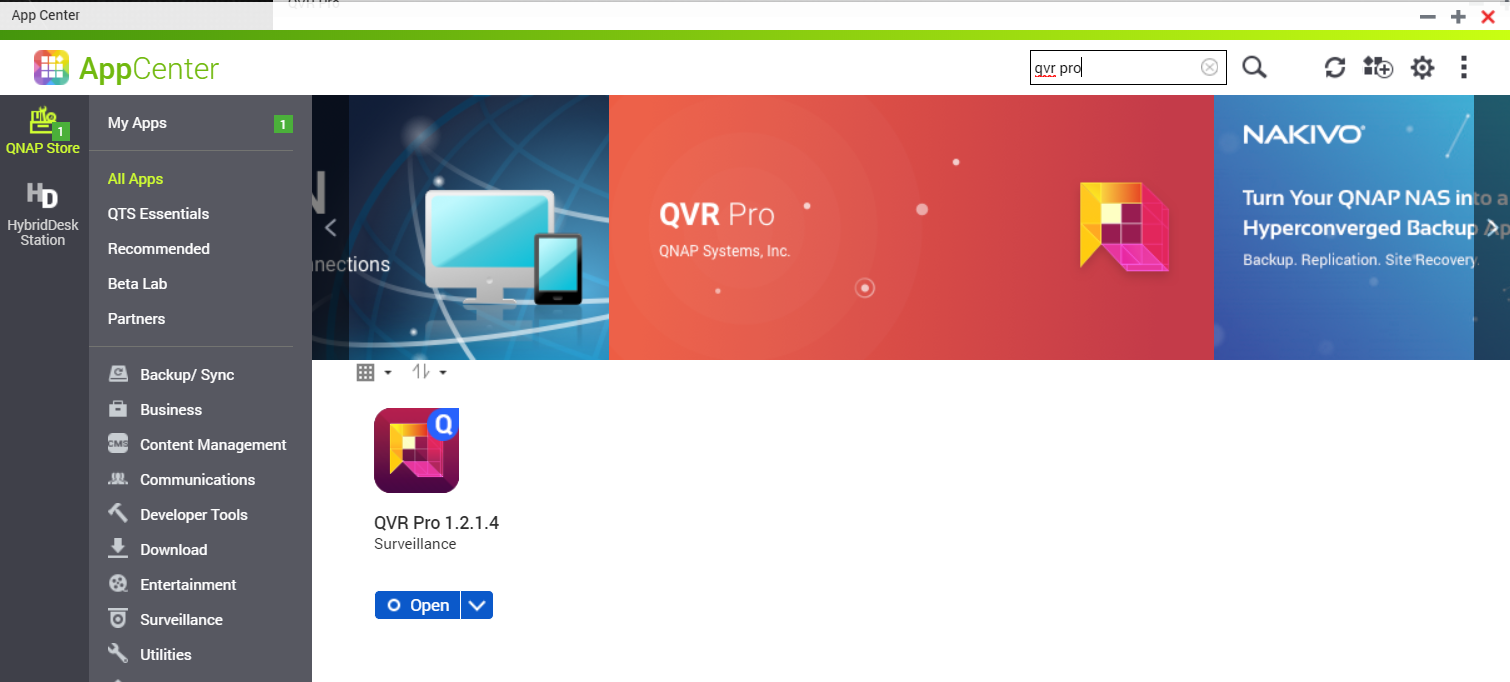
b. Go to App Center > Surveillance.
c. Locate QVR Pro and then click Install.
QTS downloads the QVR Pro installer.
d. Click Open.
The QVR Pro Initial Setup window opens.
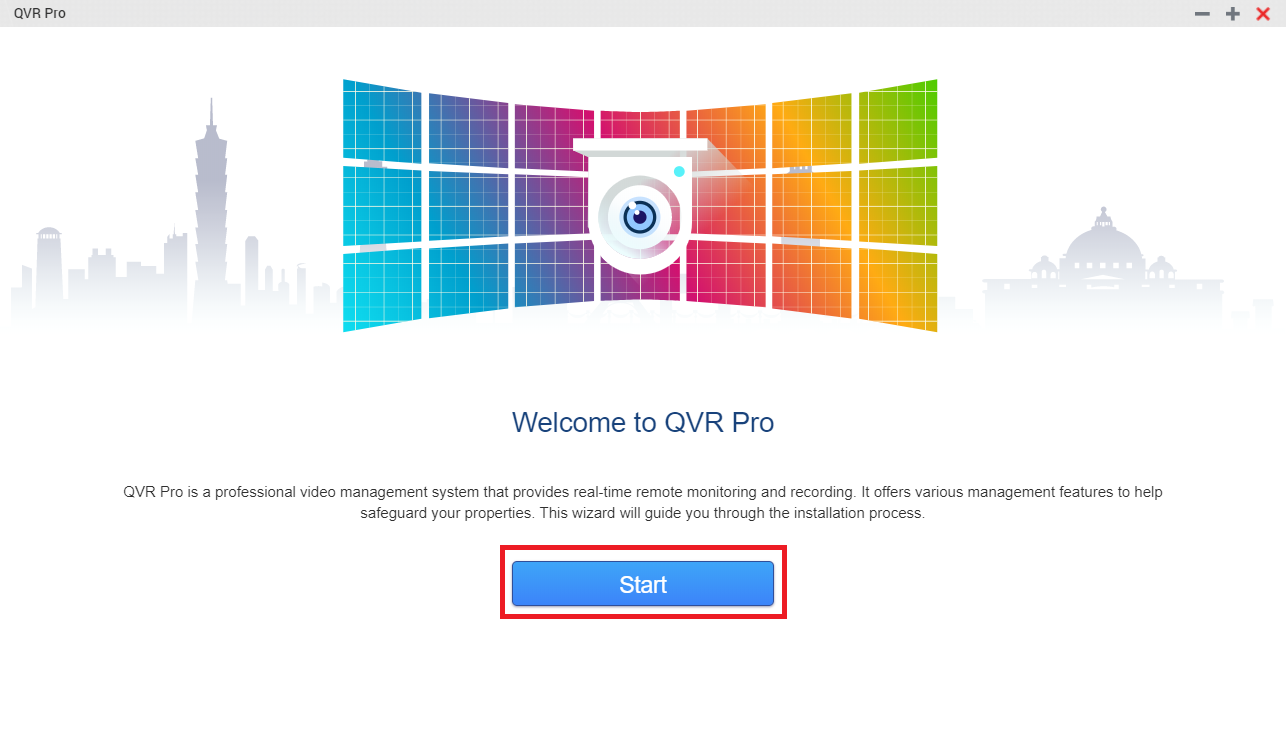
e. Click Start.
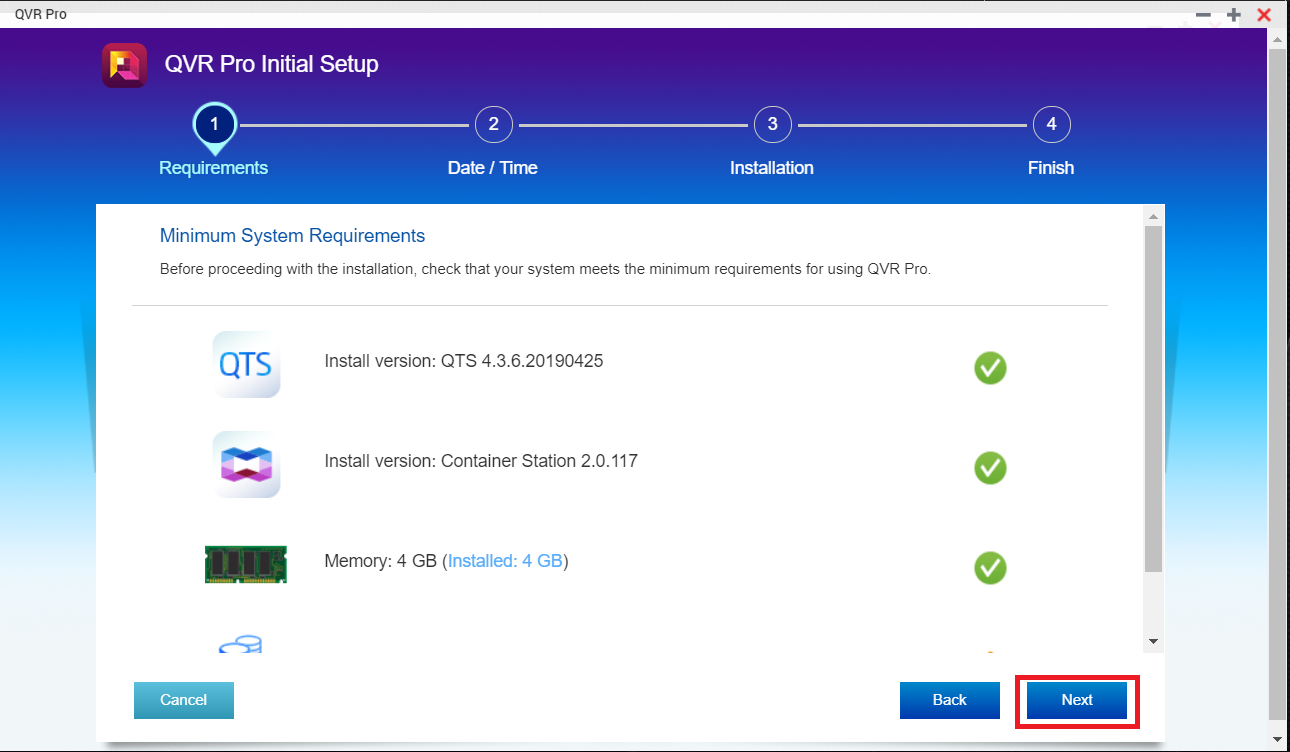
f. Verify that your system meets the minimum requirements and then click Next.
Note: A minimum of 8GB is required when using an HDMI local display.
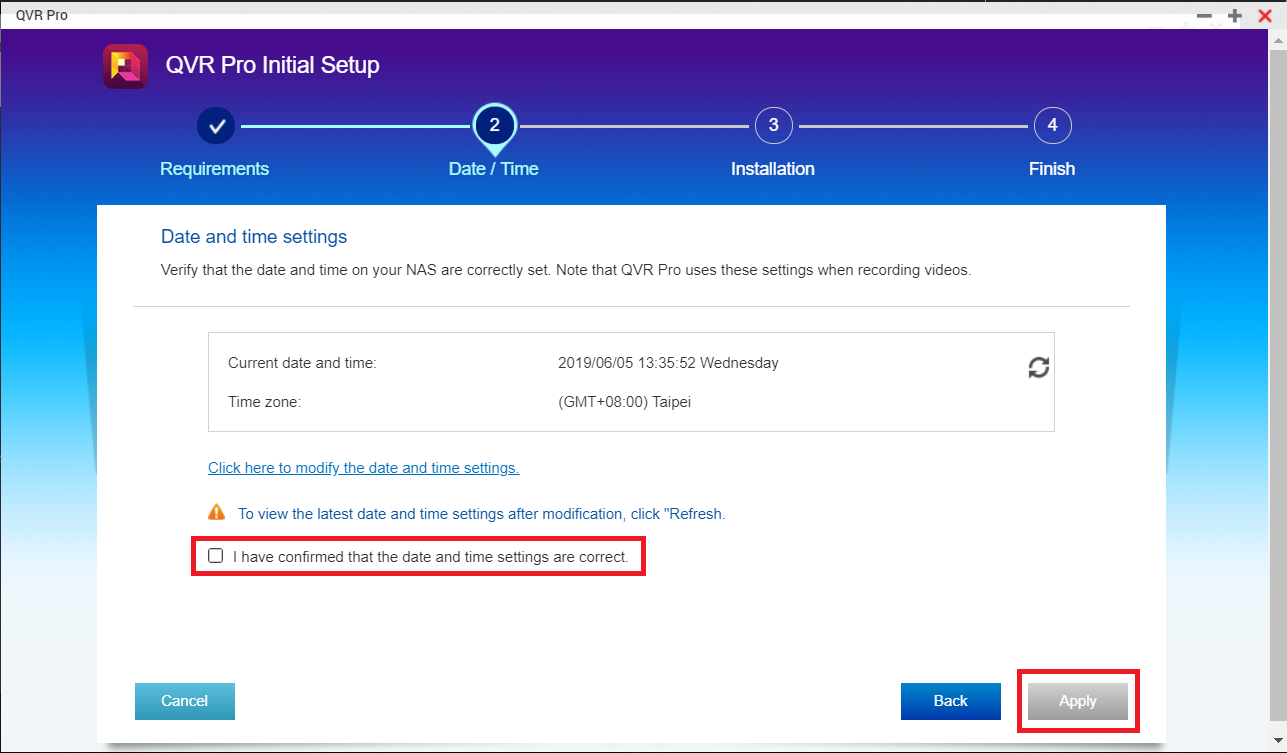
g. Review the date and time settings and then select I have confirmed that the date and time settings are correct.
h. Click Apply.
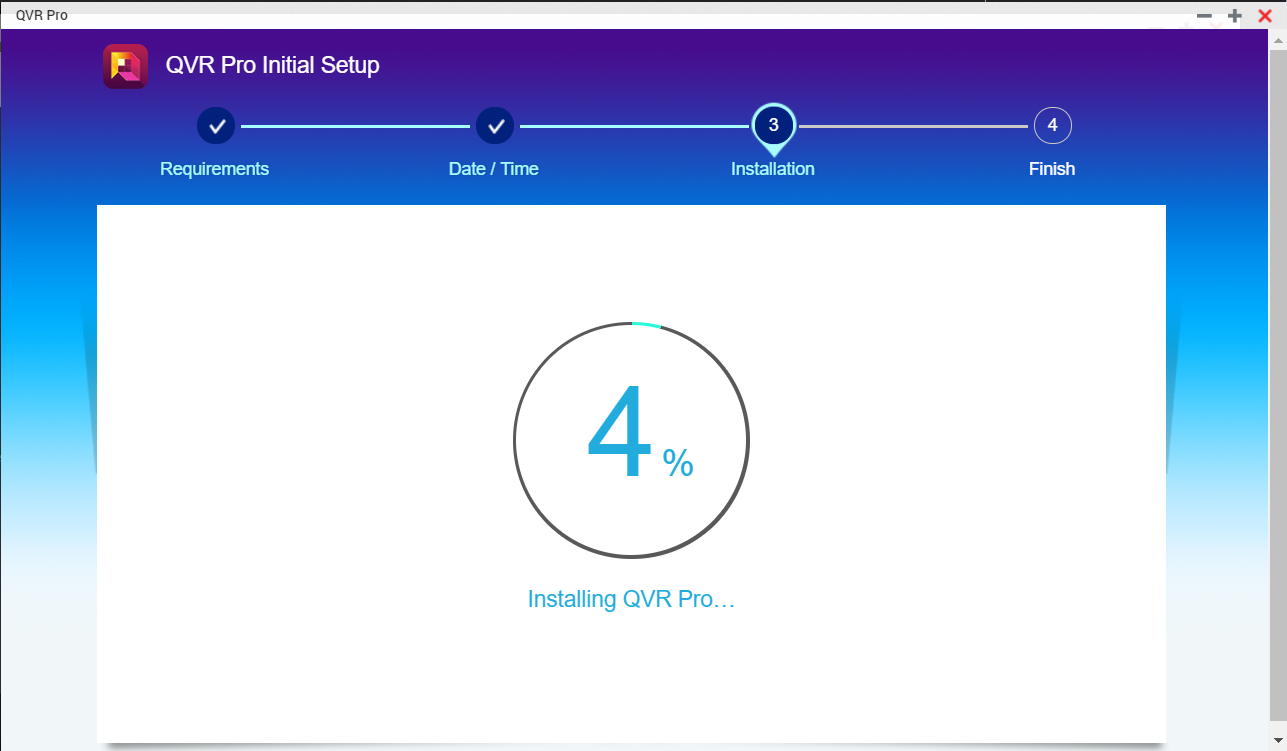
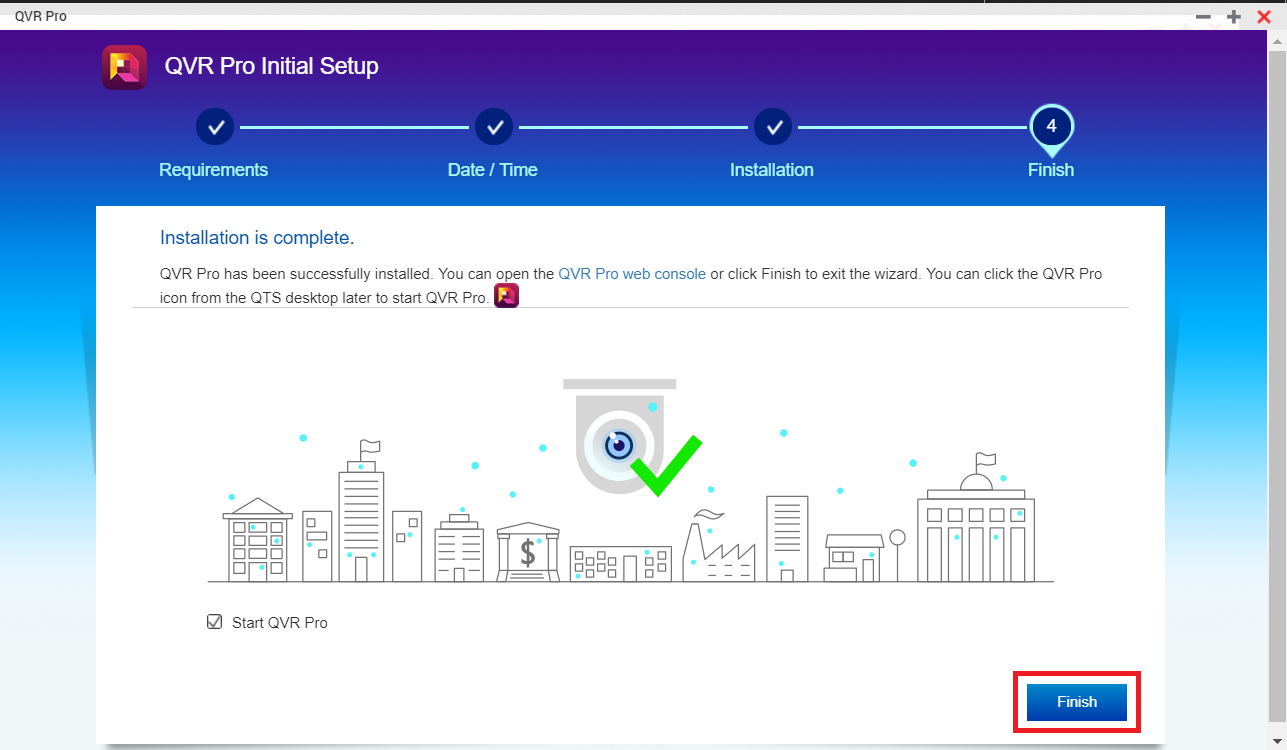
QTS installs QVR Pro and a confirmation message appears.
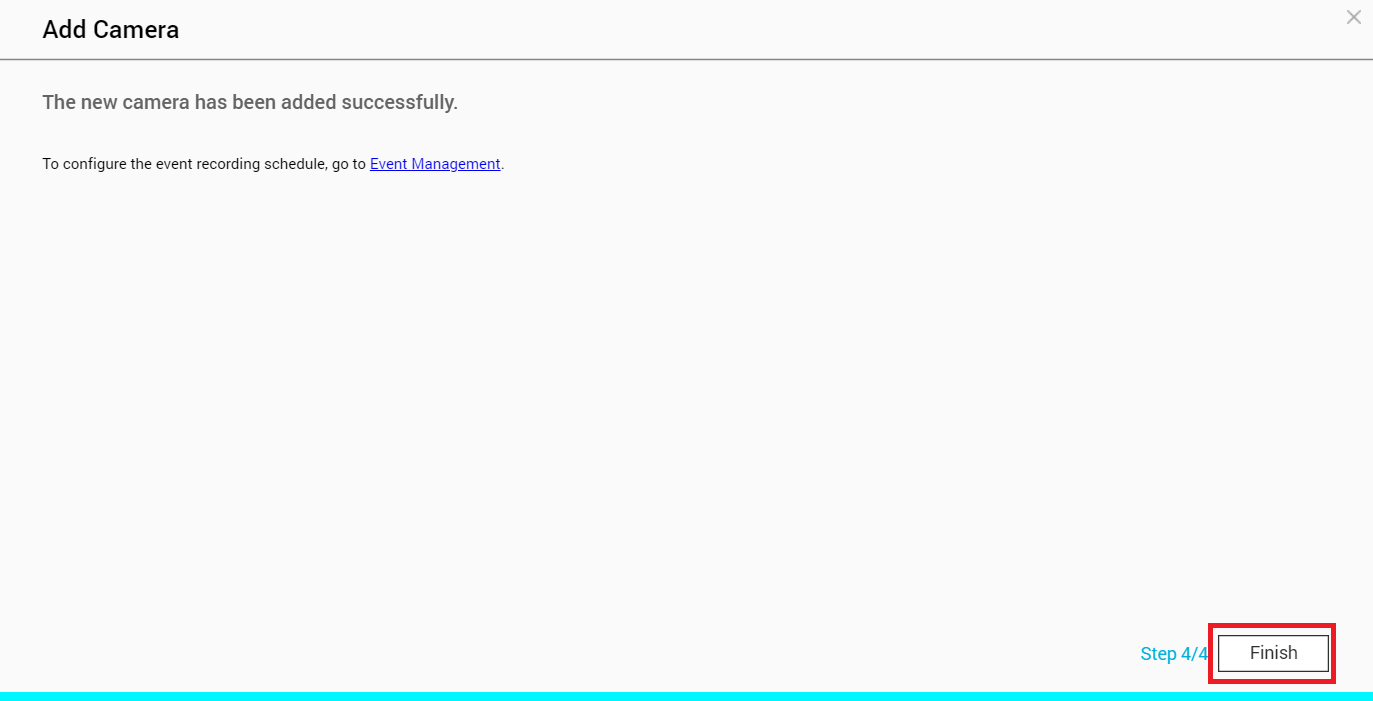
i. Click Finish.
QVR Pro is now installed on the NAS.
2. Add a recording space.
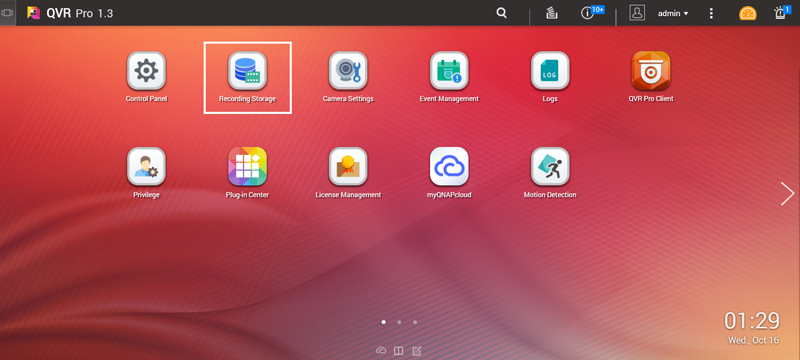
a. Open Recording Storage from the desktop or main menu.
b. Go to Recording Space.
c. Select one of the following options.
Local – Add a local recording space to allocate a fixed amount of storage space for video recordings.
HybridMount – Add a cloud recording space using HybridMount shared folders and allocate a fixed amount of storage space for video recordings.
d. Click one of the following buttons.
Button
Description
+
Click to add your first recording space.
Add
Click to add more recording spaces.
e. Specify the following information.
Field
Task
Name
Specify a name for the recording space.
Note:
Name requirements:
Length: 1-30 characters.
Valid characters: A-Z, a-z, 0-9
Valid special characters: space ( ), hyphen (-), underscore (_), and period (.)
Overwrite Trigger Threshold
Select the overwrite trigger threshold.
Note:
QVR Pro starts overwriting the oldest recording data when the percentage of used recording space exceeds the specified threshold.
f. Select a volume or a shared folder.
g. Specify the estimated size of allocated space.
h. Click Next.
i.Optional: Assign a spare volume or a spare shared folder if available.
j. Click Next.
k. Review the summary.
l. Click Apply.
m. Click Finish.
3. Add a USB camera.
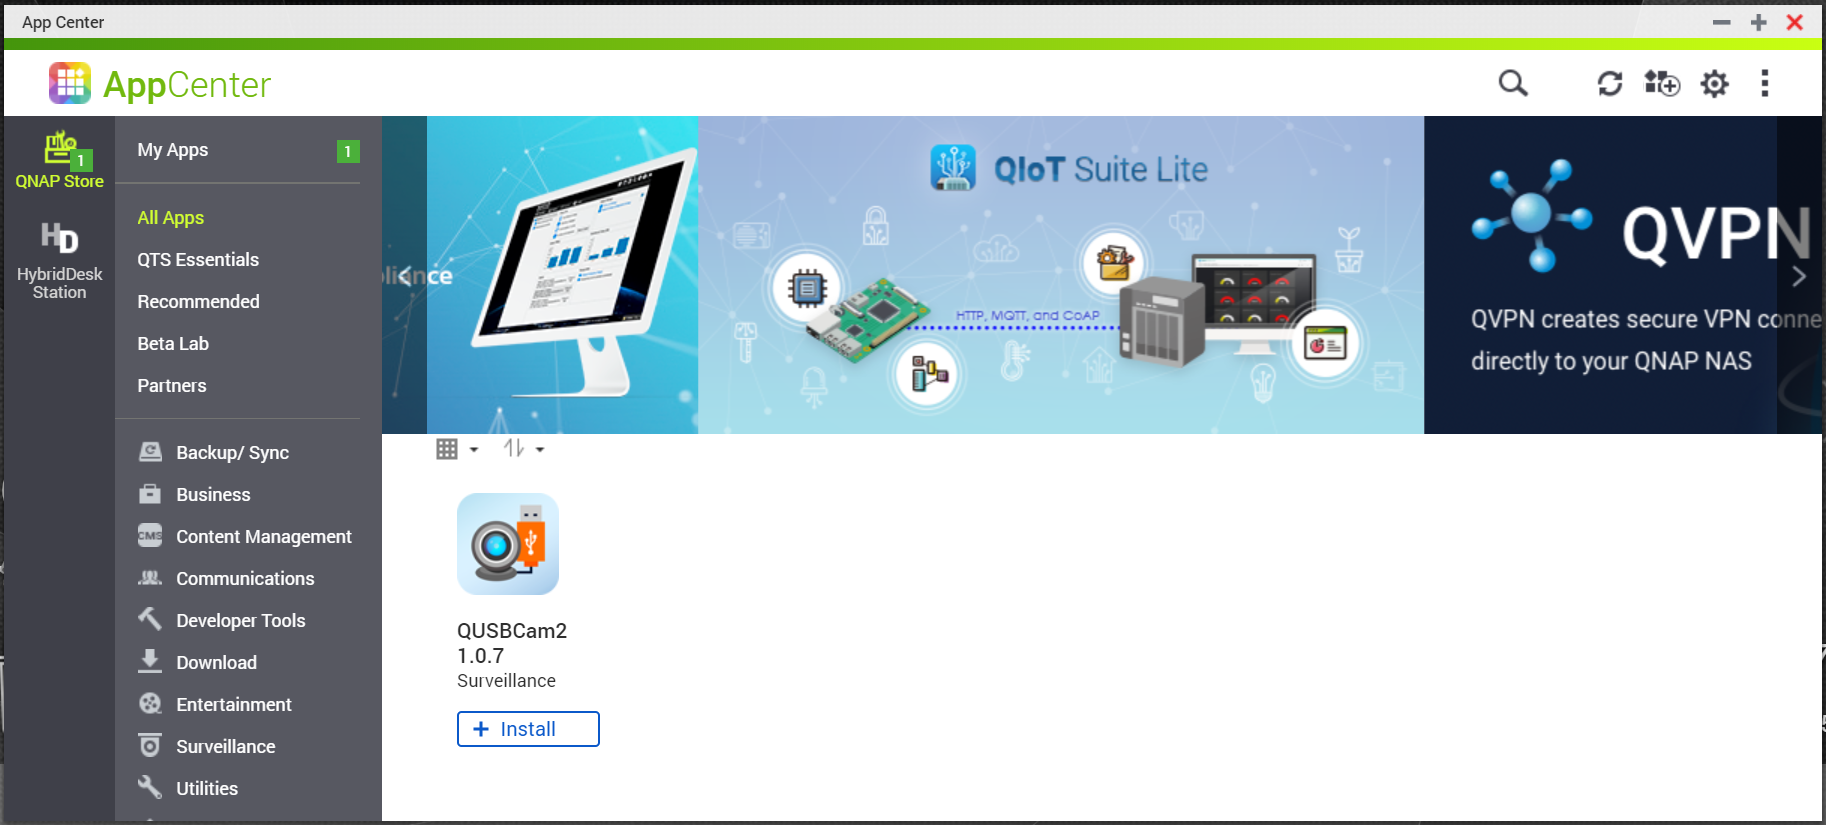
a. On QTS, go to App Center > Surveillance.
b. Locate QUSBCam2 and then click Install.
QTS installs QUSBCam2.
c. Click Open.
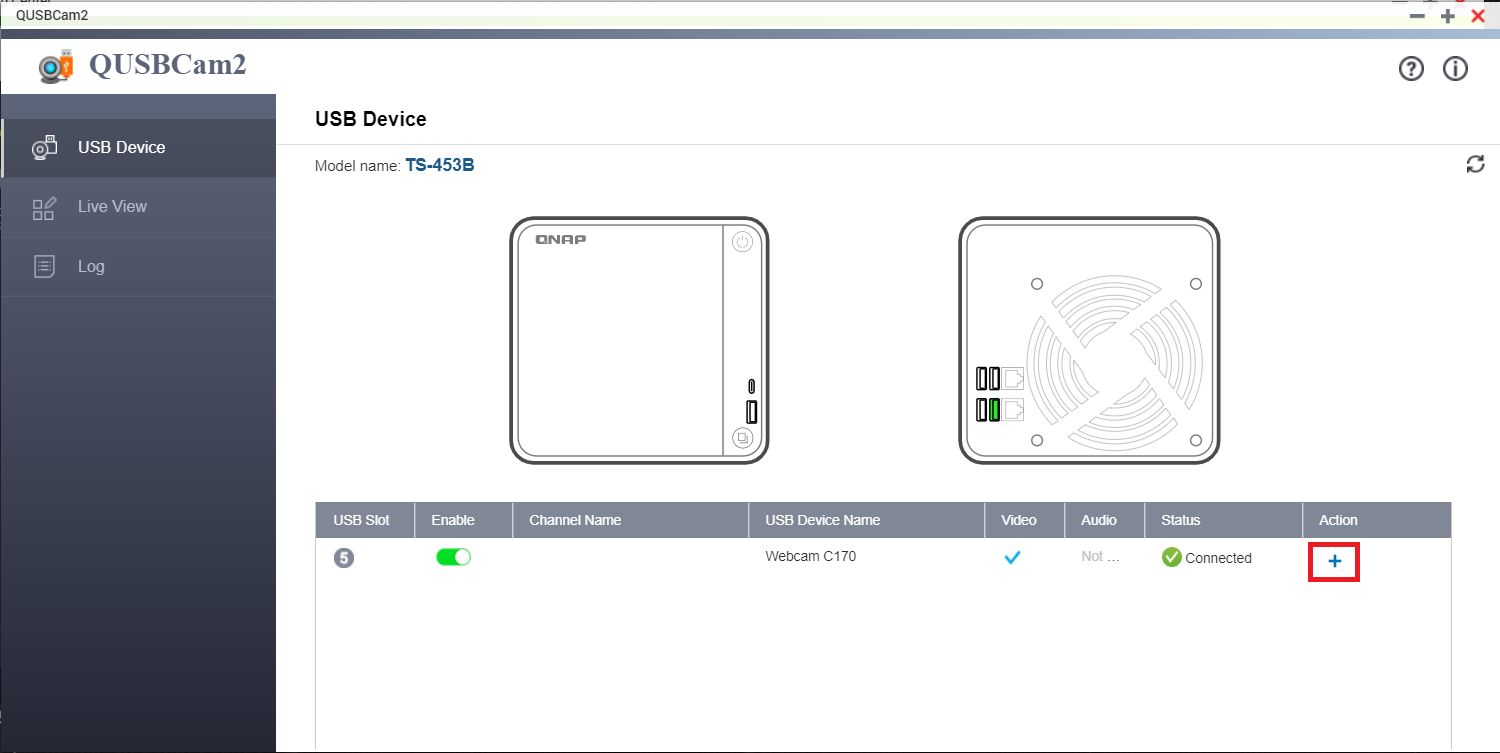
d. Connect a USB camera to the NAS.
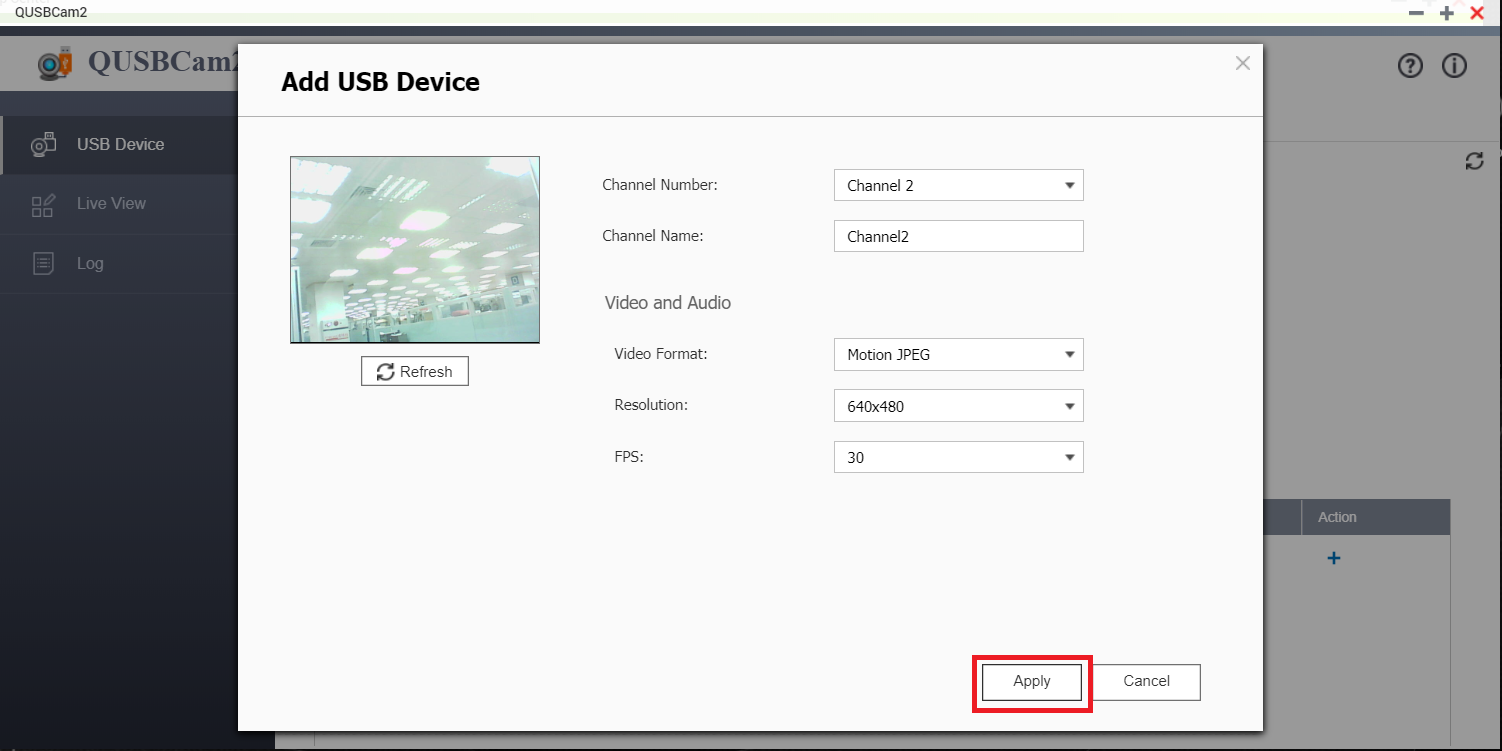
e. Click + or Create Channel.
f. Keep the default settings for the USB camera.
g. Click Apply.
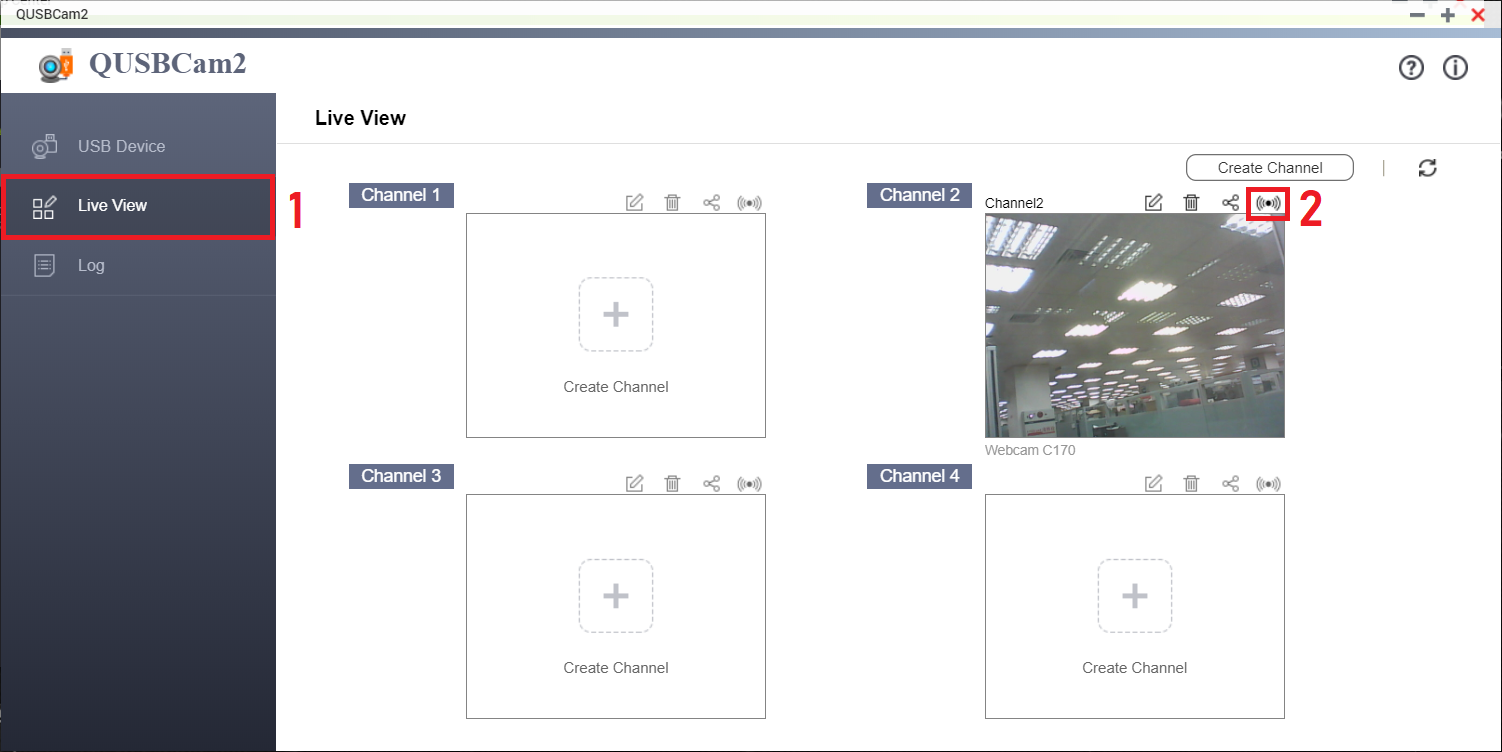
h. Go to Live View and then click the Live icon () above the USB camera channel.
4. Add the camera to QVR Pro.
a. On QVR Pro, open Camera Settings from the desktop or main menu.
b. Click one of the following buttons
Button
Description
+
Click to add your first camera.
Add
Click to add more cameras.
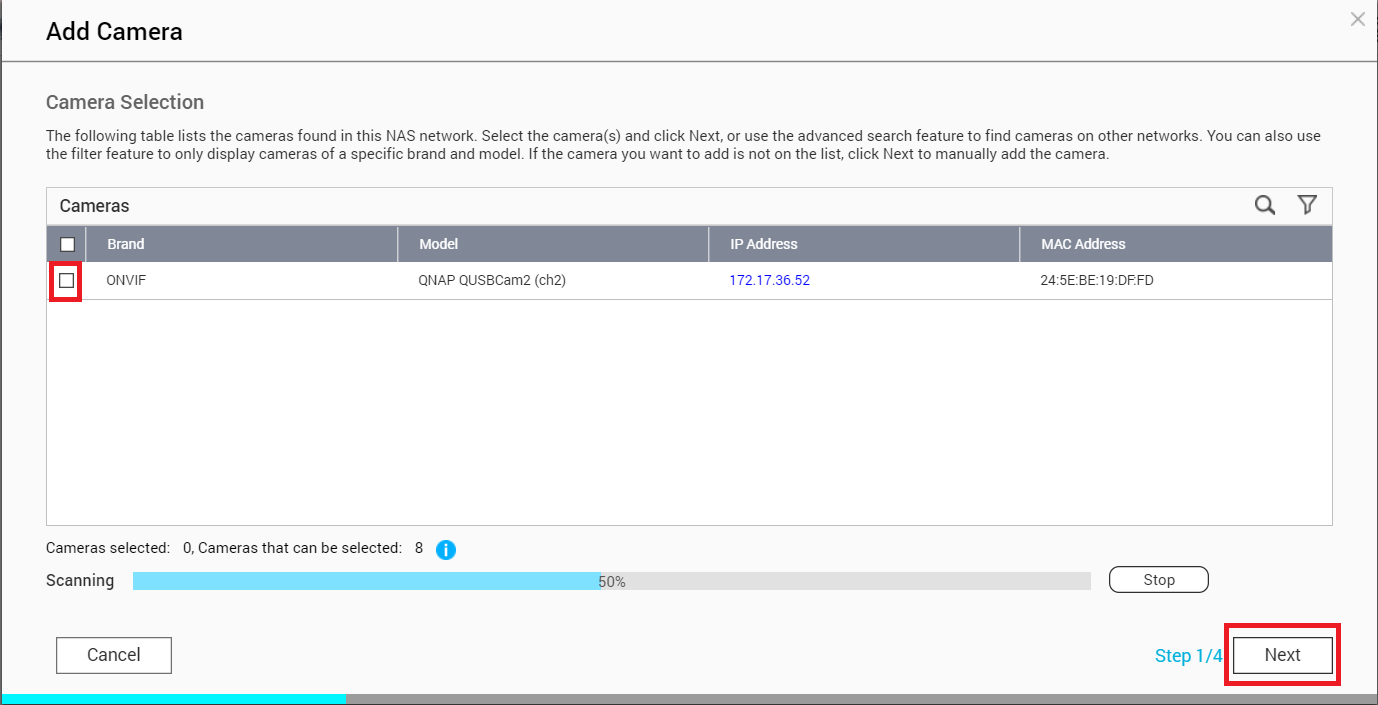
The Camera Selection screen appears.
c. Select the USB camera and then click Next.
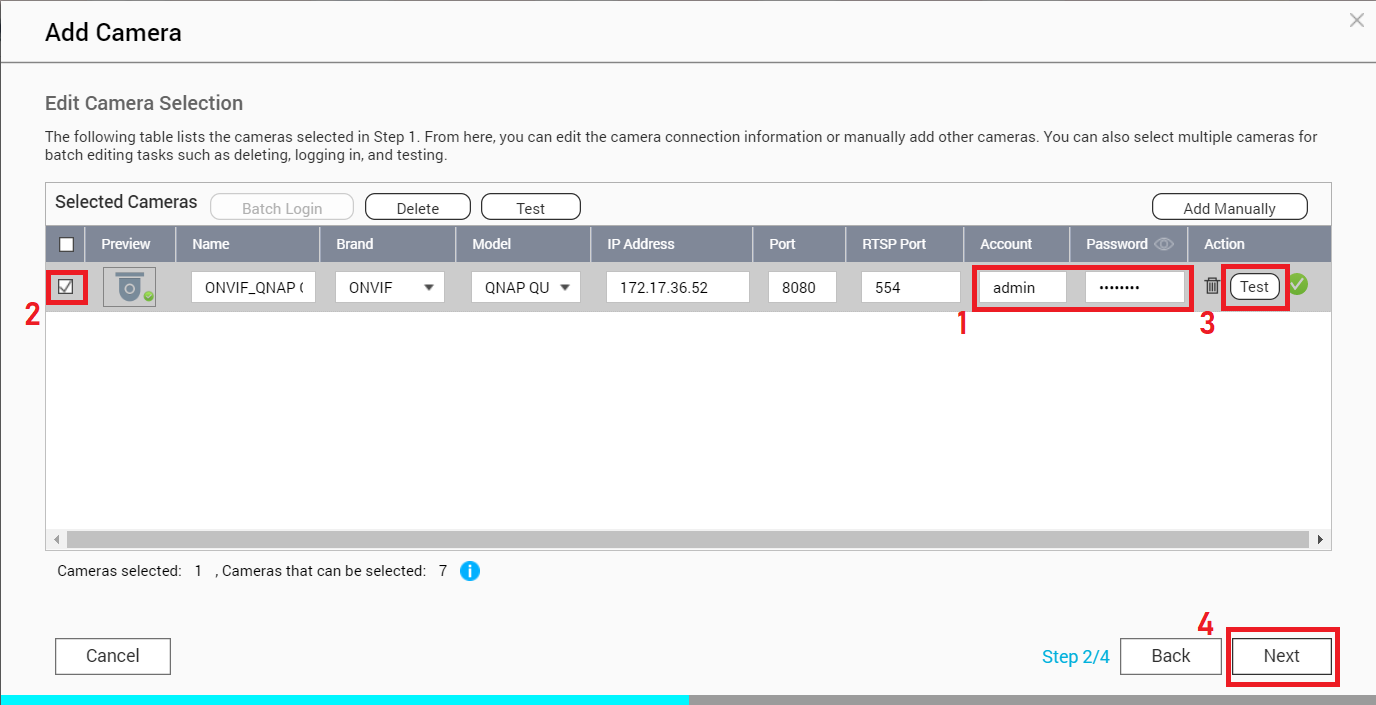
d. Enter the login credentials.
Tip:
You can click Test to verify the camera connection.
e. Click Next.
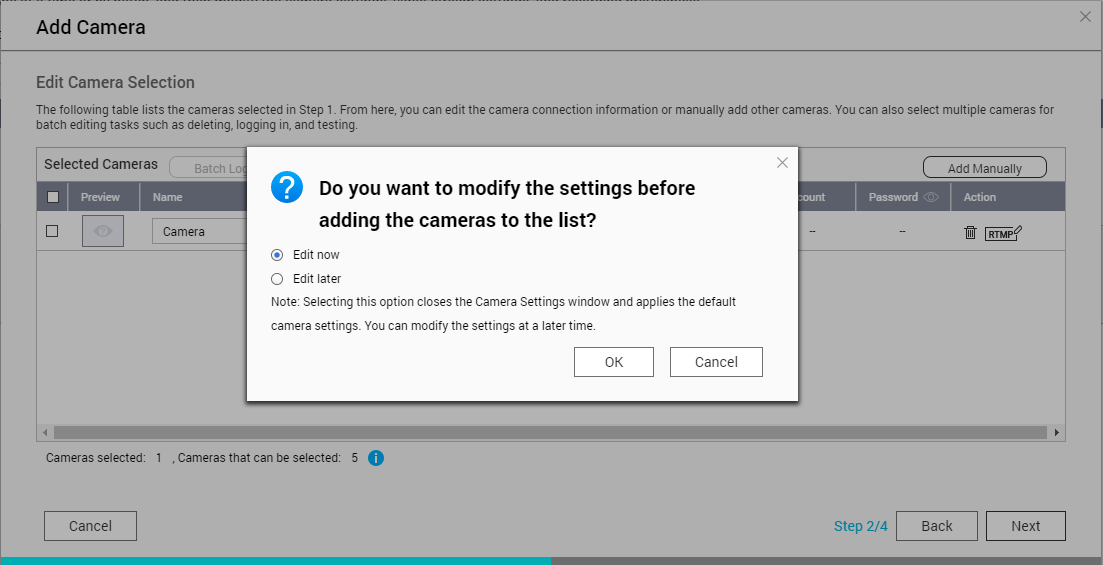
f. Select Edit later and then click OK to keep the default settings.
Tip:
You can configure the streaming and recording settings at a later time.
 ) above the USB camera channel.