Before you start:
Go to Recording Storage > Recording File Explorer and then select Use Recording File Explorer to access recordings.
Disable the Recycle Bin for the export folder.
Install QVR Pro version 1.3 or later.
QVR Pro allows you to back up recordings to another NAS, set up a backup schedule, and specify whether to stop recording or overwrite older files when the destination space is full.
1. On QTS, open QVR Pro.
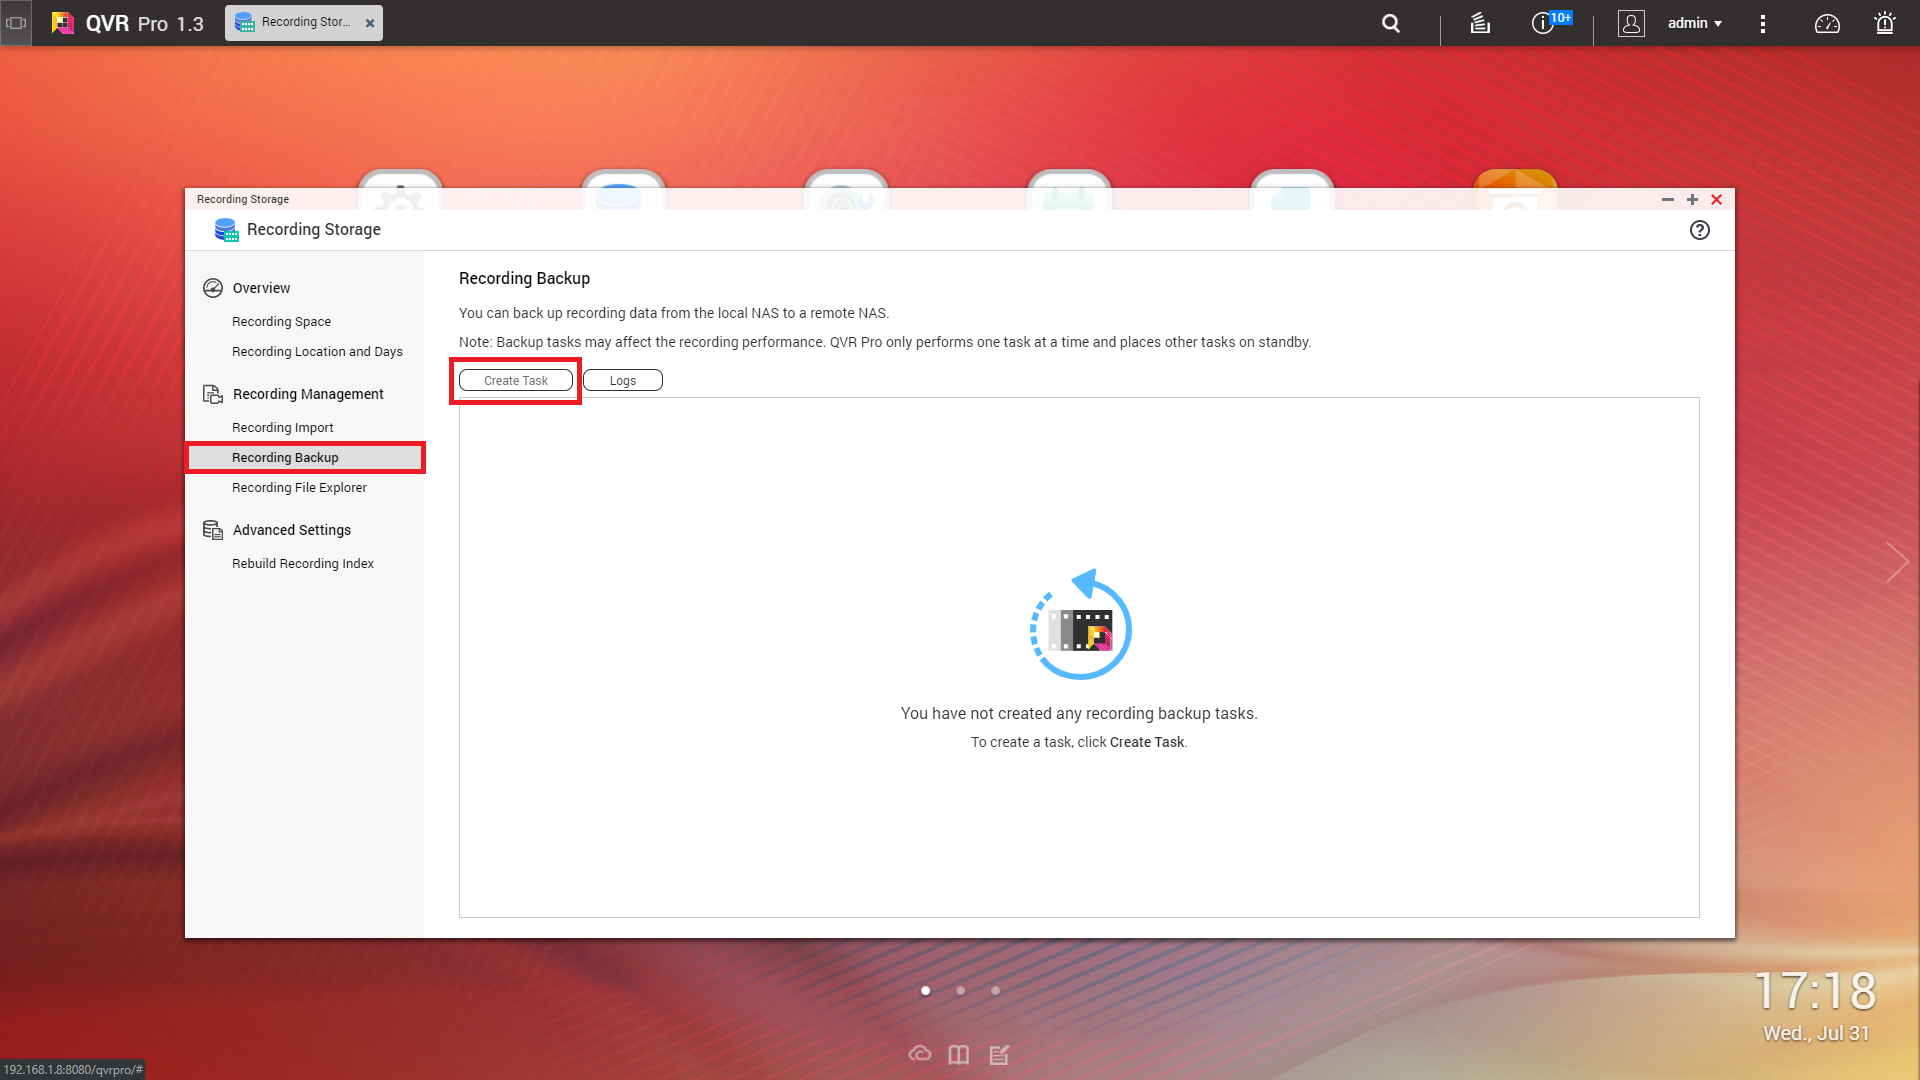
2. Open Recording Storage from the desktop or main menu.

3. Go to Recording Backup.
4. Click Create Task.
| Field | Action |
| Task name | Specify a name for the backup task. Note: Name requirements:
|
| Name or IP address | Specify the name or the IP address of the destination NAS. |
| Port number | Specify a port number for the connection. |
| Username | Specify a username for the destination NAS. |
| Password | Specify the password. |
| Path | Specify a path for the backup recording data. |
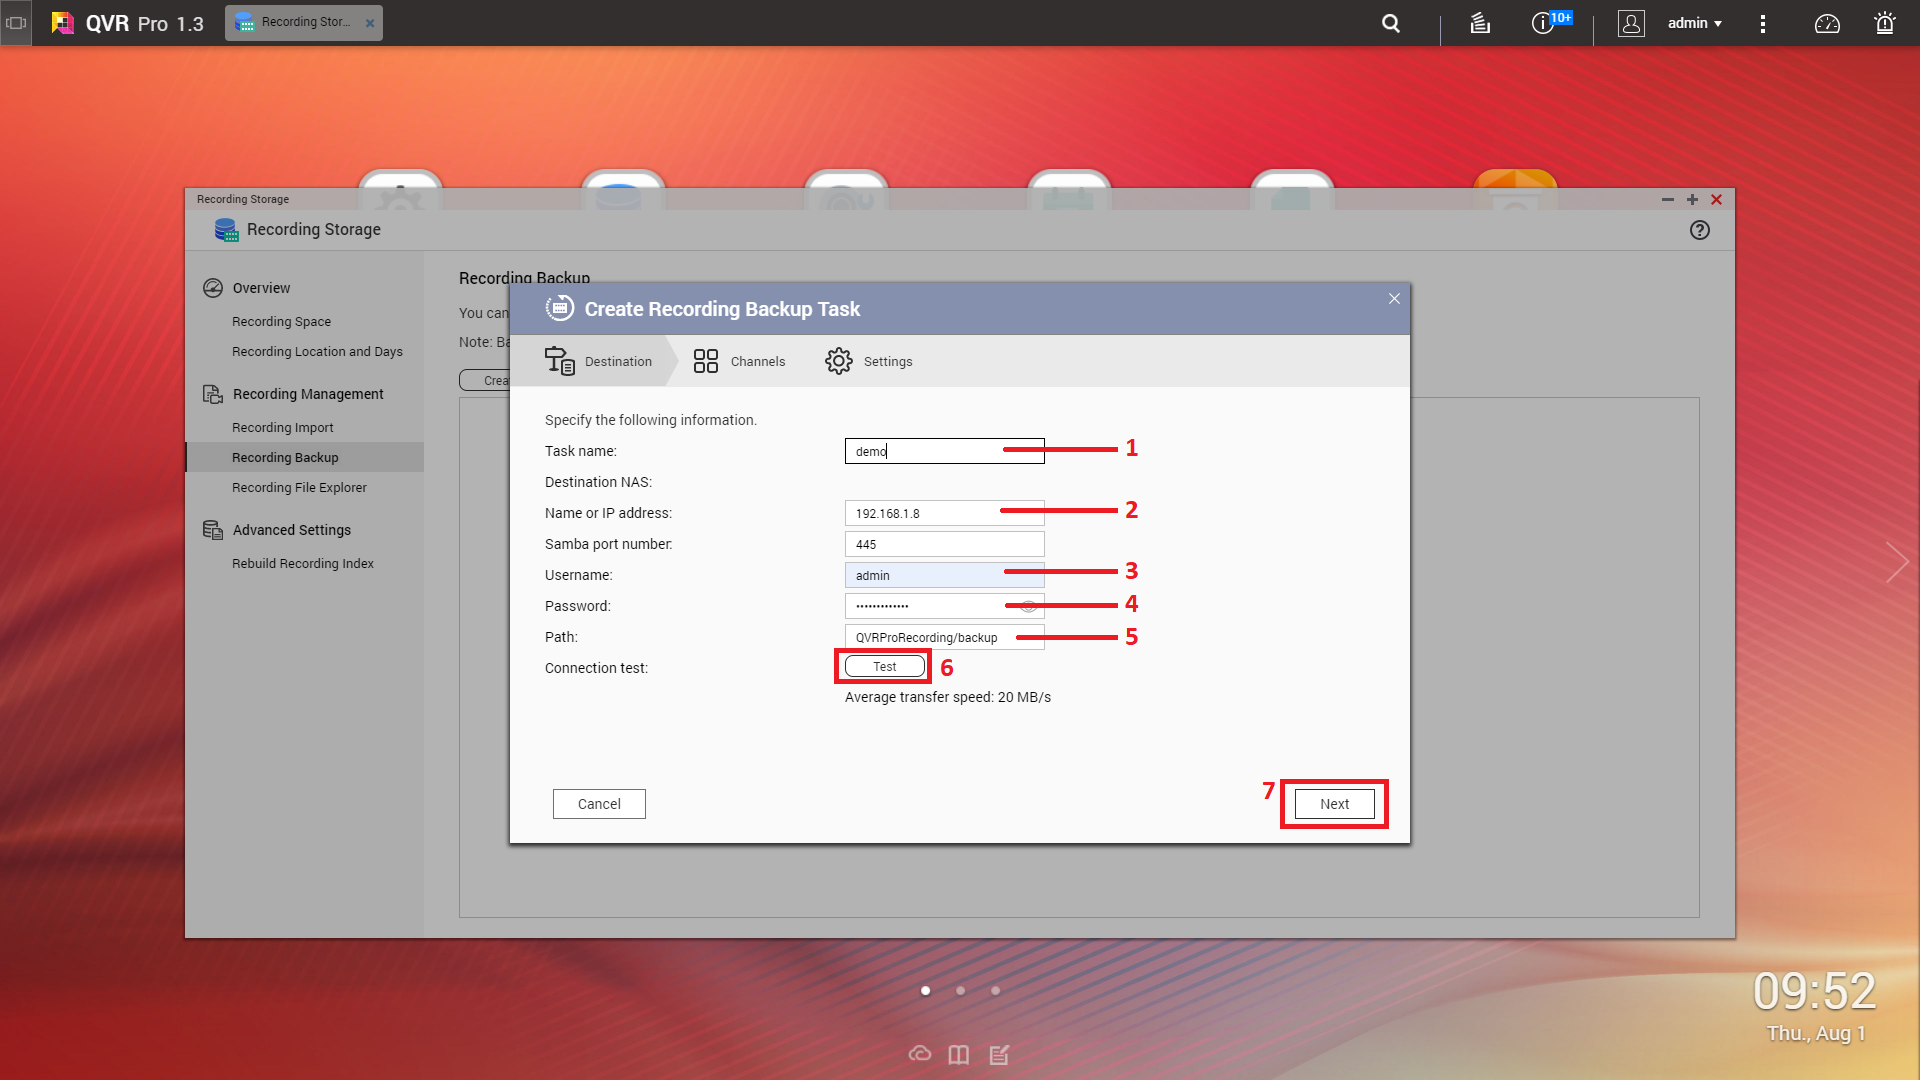
6. Optional: Click Test.
QVR Pro tries to connect to the destination NAS with the specified credentials and then displays the test result.
7. Click Next.
8. Select camera channels from the channel list.
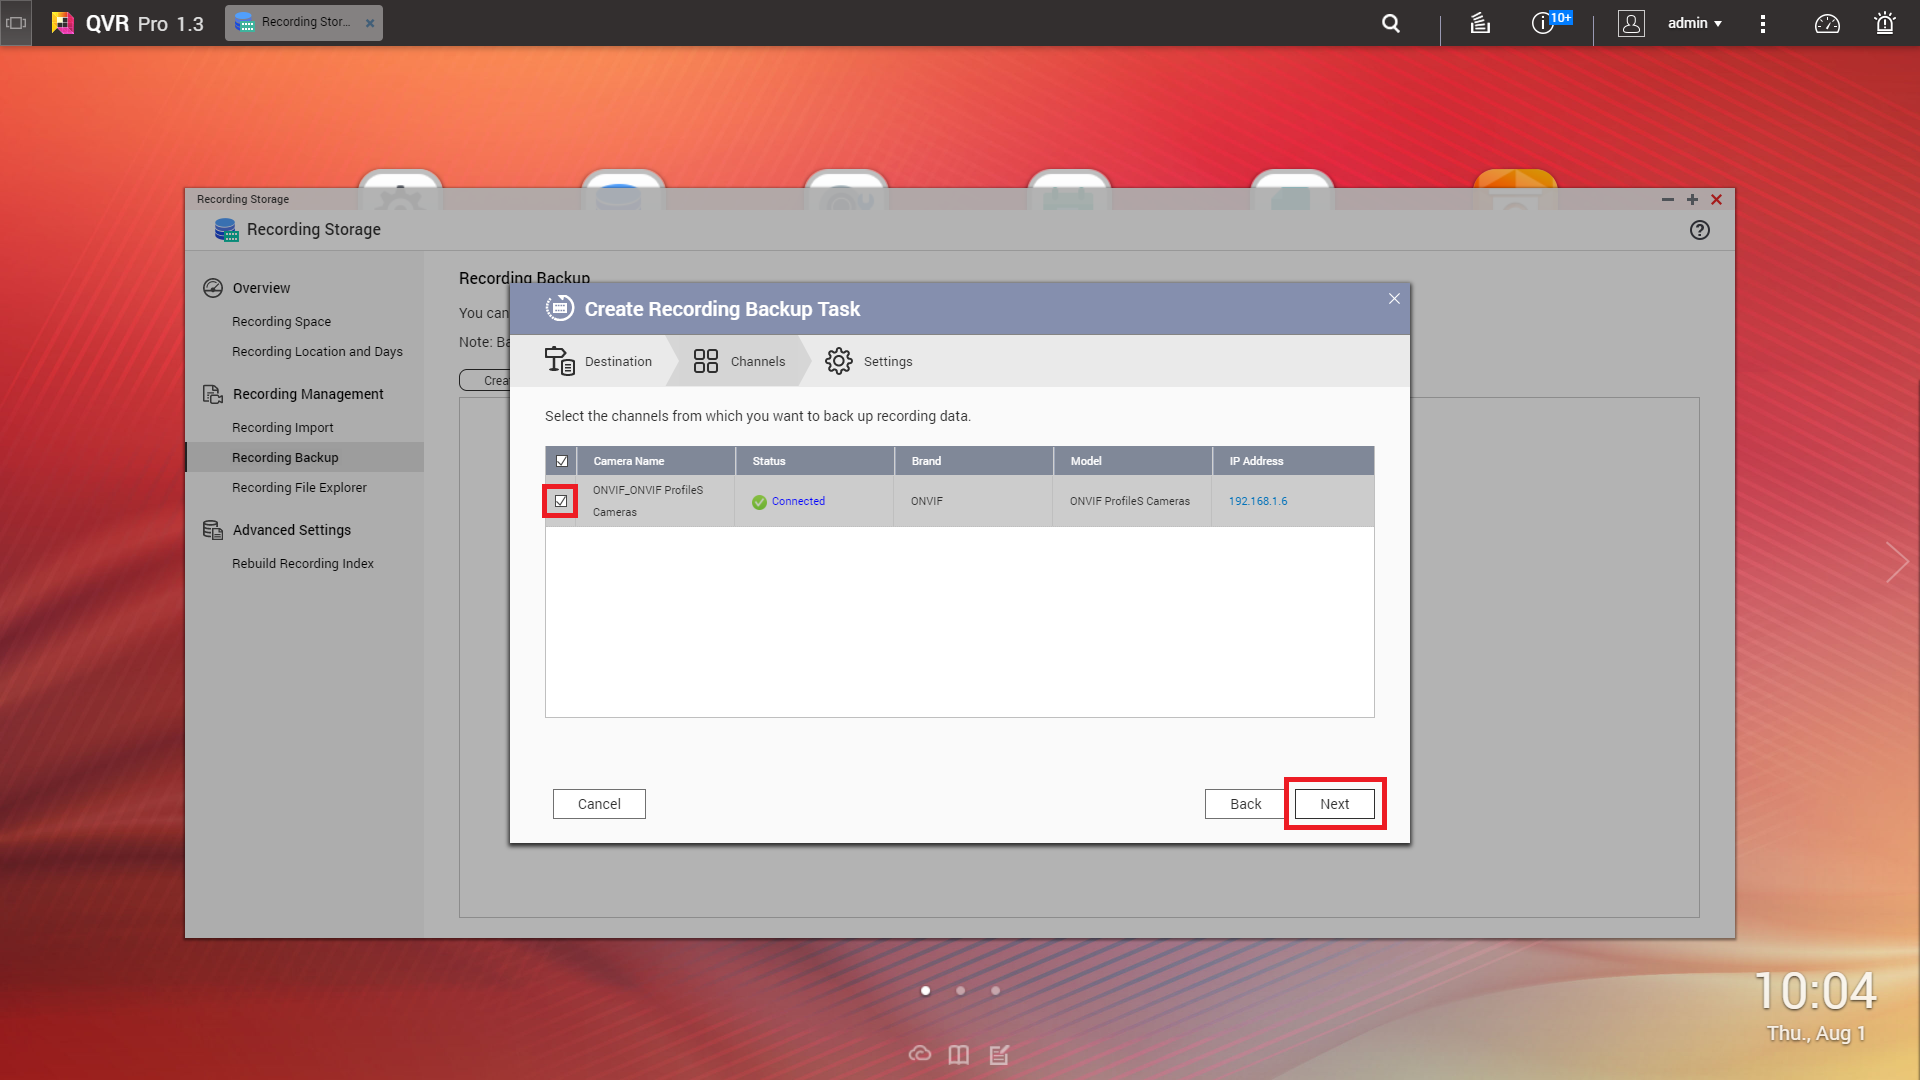
9. Click Next.
10. Select one of the following backup plans
| Plan | Action |
| Back up recording data in the last few days |
|
| Back up recording data in a specific time range |
|
11. Specify a backup schedule.
Note:
You will not be able to return to this screen at a later time. If you need to modify the backup schedule, you must do it at this point.
a. Click Backup Schedule.
The Backup Schedule window appears.
b. Select one of the schedule options.
c. Specify the backup time or the interval between every backup.
d. Click Apply.
12. Optional: Select Perform the backup task immediately.
13. Select a recording type.
14. Select a recording format.
Note:
If you plan on importing the backup recordings in the future, you must select the QVR Pro format. You can only import recordings in QVI format.
15. Configure backup rules.
a. Optional: Specify a retention period for the recording data.
b. Specify a storage policy in the event that the destination space is full.
16. Click Finish.
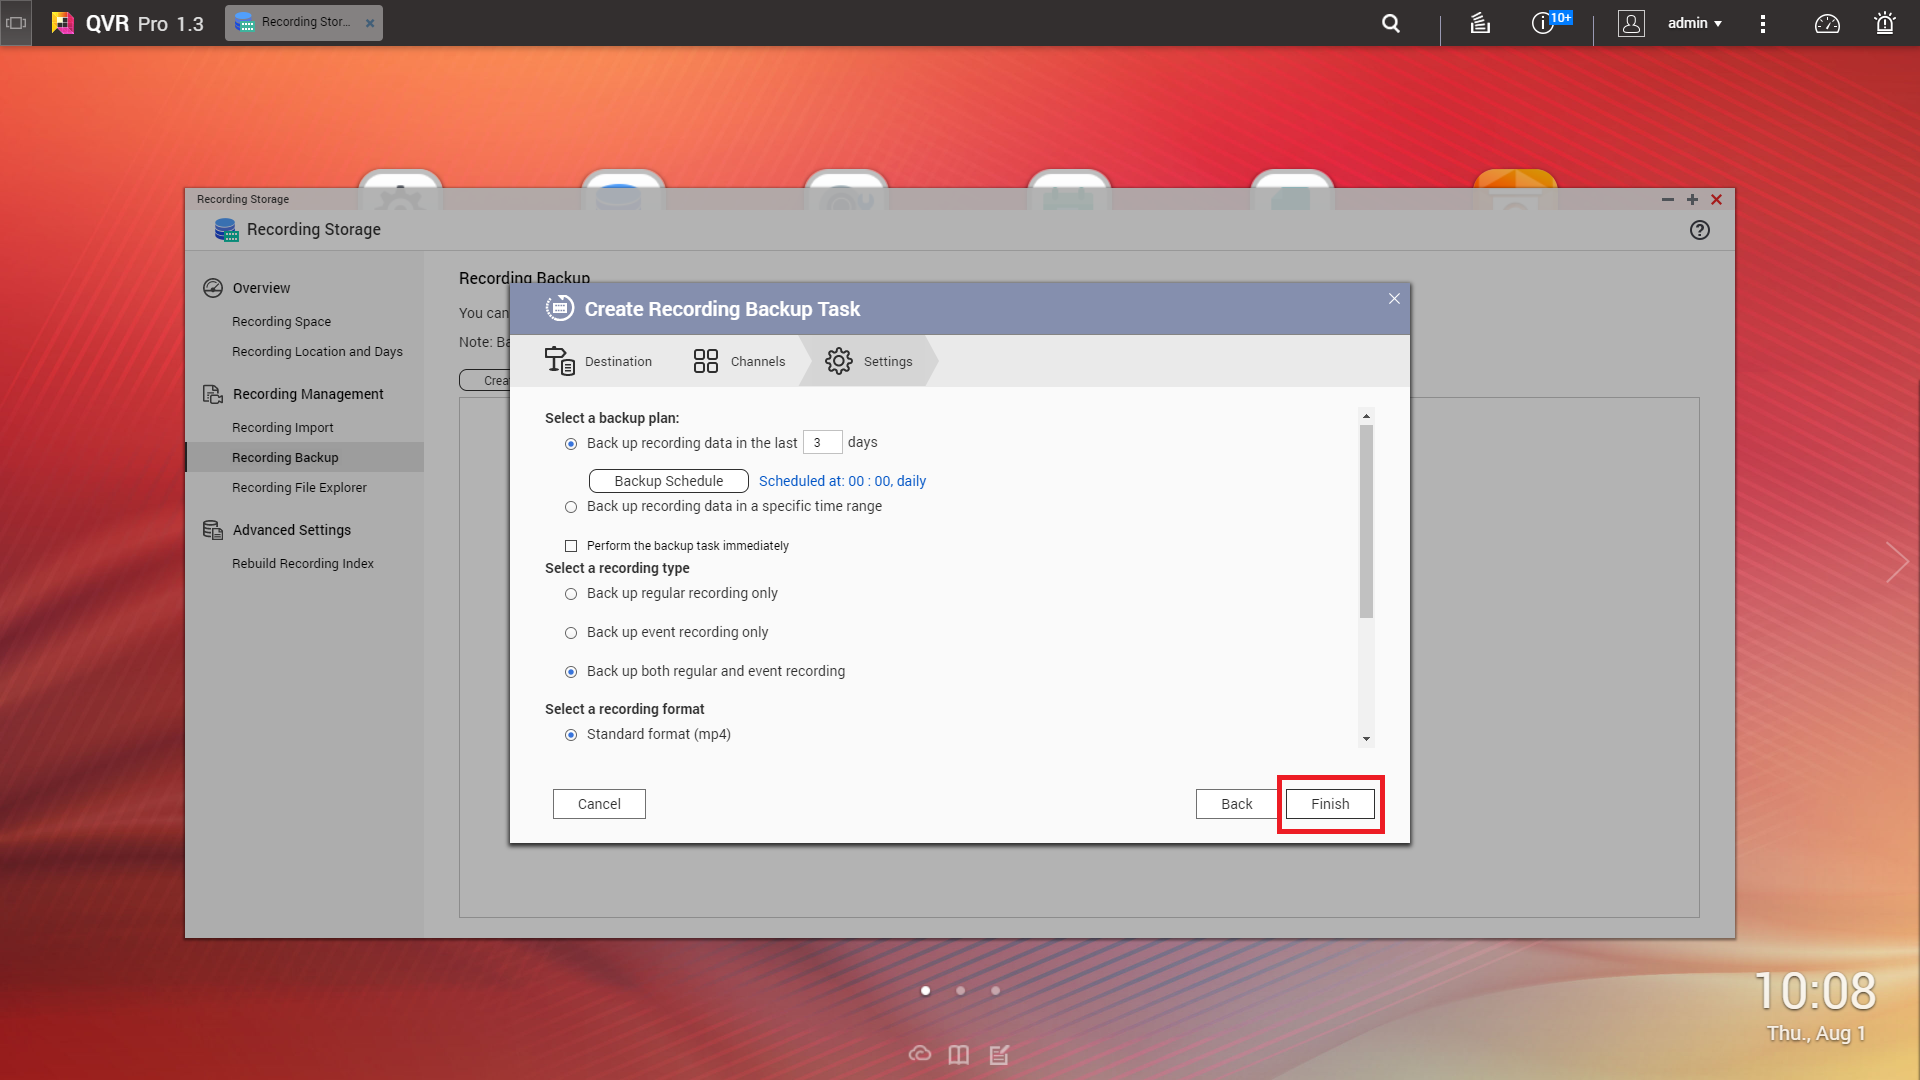
QVR Pro creates the recording backup task. You can view and manage tasks on the task list.